If you need
to ship your product or transport it a long distance, prepare it
for transportation as follows.
- Open the
printer cover and check that the ink cartridge holder is all the
way to the right (the home position). If necessary, plug in and
turn on the product, then turn it off again using the
 power button after the ink
cartridge holder is in the home position.
power button after the ink
cartridge holder is in the home position. - Fasten
the ink cartridge holder to the case using tape. Leave the ink
cartridges installed to avoid damaging the product.
Note: Some tape may be difficult to remove if left in place for a long time. Remove the tape immediately after transporting the product.
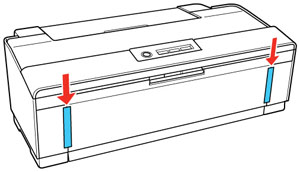
- Close the printer cover and output tray, then secure both sides of the output tray to the outer case with tape as shown.