You can manage how colors are handled in your photos through the Color Matching and Color Options pop-up menus.
|
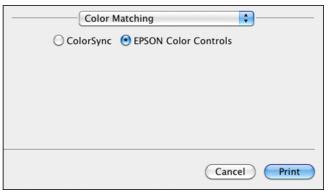
1.
|
Select Color Matching from the pop-up menu.
|
|
2.
|
To use a ColorSync profile, click ColorSync and select the profile for the paper you are using.
|
|
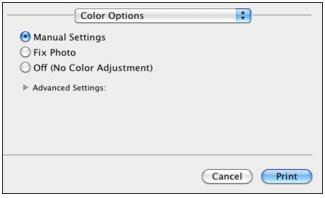
1.
|
Select Color Options from the pop-up menu.
|
|
•
|
Select Manual Settings and click Advanced Settings to select a color Mode for printing the colors in photos and graphics: EPSON Standard, EPSON Vivid, or AdobeRGB.
|
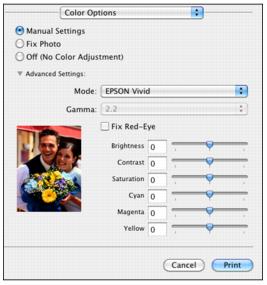
Gamma adjusts the midtone density in the print (available only when using AdobeRGB).
You can also adjust Brightness, Contrast, Saturation, and individual Cyan, Magenta, and Yellow color tones and enable the Fix Red-Eye feature.
|
•
|
Fix Photo automatically analyzes your photos and, if necessary, adjusts the brightness, contrast, and saturation. Click Advanced Settings to select Scene Correction and choose Auto Correct, People, Landscape, Night Scene, Sepia, or Gray.
|
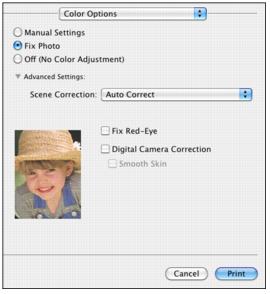
Note:
Fix Photo (or Auto Photo Correction) uses a sophisticated face recognition technology to optimize photos that include faces. For this to work, both eyes and the nose must be visible in the subject’s face. If your photo includes a face with an intentional color cast, such as a statue, you may want to turn off Fix Photo to retain the special color effects.
Fix Photo (or Auto Photo Correction) uses a sophisticated face recognition technology to optimize photos that include faces. For this to work, both eyes and the nose must be visible in the subject’s face. If your photo includes a face with an intentional color cast, such as a statue, you may want to turn off Fix Photo to retain the special color effects.
|
•
|
Off (No Color Adjustment) turns off printer software color adjustments so you can use the color adjustments in your program only.
|