- Turn off the Epson Stylus CX.
- Remove any paper from the sheet feeder and close the paper support.
- Unplug the power cord from the electrical outlet and disconnect the power cord from the Epson Stylus CX. Then disconnect the USB cable from the Epson Stylus CX.
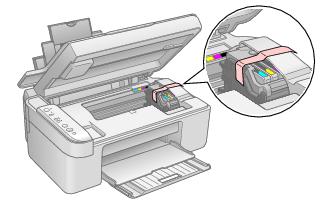
- Open the scanner section and make sure the ink cartridge holder is in the home position on the right.
- Secure the ink cartridge holder (print head) to the case with tape.
- Close the scanner section, push in the output tray extension, and close the output tray.
- Repack the Epson Stylus CX in the original box using the protective materials that came with it.
Caution:
Be sure to remove the tape after installing the printer in its new location.