|
•
|
Select a printing preset to quickly select settings for common paper types, sizes, and print qualities.
|
For quick access to the most common settings, click the Shortcuts tab. Point to one of the Printing Presets to view a list of the settings for it.
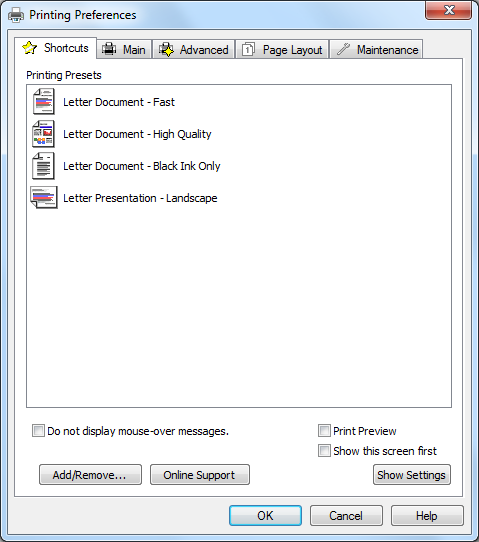
To delete a preset you created, click Add/Remove on the Shortcuts tab, select the preset, and click Delete.
To reorder the list, highlight one of the Printing Presets and click the up or down arrow to move it. Or click Reset to return the list to its original order.
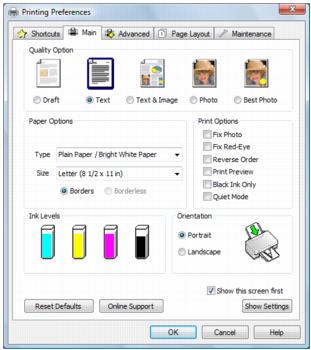
Click the Main tab on the top of the printer settings window to select your basic print options.
|
1.
|
Select a Quality Option that matches your document or photo, and the print quality you want.
|
|
•
|
Draft: for rough drafts with reduced print quality
|
|
•
|
Text: for documents containing text or images with standard print quality
|
|
•
|
Text & Image: for documents with text or images with better print quality
|
|
•
|
Photo: for photos and graphics with good print quality and speed
|
|
•
|
Best Photo: for photos or graphics with high print quality
|
|
2.
|
Select the paper Type setting that matches the paper you loaded.
|
You can load paper in these sizes and select the size in the printer software. (Wider papers are for use only when reducing large images with the Reduce/Enlarge Document option.) A User Defined option is also available so you can create a custom size.
Envelope #10 (4 1/8 × 9 1/2 inches)
|
4.
|
If you’re printing borderless photos, select Borderless. For documents or photos with borders, select Borders.
|
|
5.
|
Choose Portrait or Landscape orientation for your document or photo. (Choose Landscape for envelopes.)
|
|
•
|
Select Print Options
|
|
•
|
Fix Photo: automatically analyzes your photos and, if necessary, adjusts the brightness, contrast, and saturation.
|
Note:
Fix Photo uses a sophisticated face recognition technology to optimize photos that include faces. For this to work, both eyes and the nose must be visible in the subject’s face. If your photo includes a face with an intentional color cast, such as a statue, you may want to turn off Fix Photo to retain the special color effects.
Fix Photo uses a sophisticated face recognition technology to optimize photos that include faces. For this to work, both eyes and the nose must be visible in the subject’s face. If your photo includes a face with an intentional color cast, such as a statue, you may want to turn off Fix Photo to retain the special color effects.
|
•
|
Fix Red Eye: removes the red eye from your photos.
|
|
•
|
Reverse Order: reverses the order in which your document prints to last-page-first.
|
|
•
|
Print Preview: lets you preview how your document or photo will look when printed.
|
|
•
|
Black Ink Only: for printing text and graphics in shades of gray (not recommended for printing black-and-white photos). Some color ink will still be used for print head maintenance.
|
|
•
|
Quiet Mode: reduces the print speed slightly for quieter operation.
|
|
•
|
See a summary of your settings (click Show Settings)
|
|
•
|
Return to the default settings (click Reset Defaults)
|
|
•
|
Access the Epson product support website (click Online Support)
|