If your printout has a quality problem but the image looks fine on your computer screen, check the solutions in this section.
|
•
|
Select a higher Quality Option or Print Quality and turn off High Speed mode in the Windows, Mac OS X 10.3 and 10.4, or Mac OS X 10.5 printer software.
|
|
•
|
Make sure the paper Type or Media Type setting matches the paper you loaded.
|
|
•
|
|
•
|
Align the print head.
|
|
•
|
|
•
|
Align the print head.
|
|
•
|
|
•
|
If you are using double-sided paper and printing heavily saturated or dark images on the front side of the paper, you may notice that smudges or marks appear on the front when you print the second side. If one side of the paper will contain a lighter image or text, print that side first to eliminate marks or smudging.
|
|
•
|
Make sure the paper Type or Media Type setting matches the paper you loaded.
|
|
•
|
Make sure your paper isn’t damaged, old, dirty, or loaded face-down. If it is, reload a new stack of paper with the printable side up; it is usually brighter or whiter than the other side. For best results, use genuine Epson paper.
|
|
•
|
Select a higher Quality Option or Print Quality, and turn off High Speed and Fast Economy or Economy mode in the Windows, Mac OS X 10.3 and 10.4, or Mac OS X 10.5 printer software.
|
|
•
|
Select Photo RPM for Quality Type (Windows) or Print Quality (Mac OS X 10.3 and 10.4 or Mac OS X 10.5). Remember that this setting increases print time.
|
|
•
|
Align the print head.
|
|
•
|
|
•
|
Make sure your Windows, Mac OS X 10.3 and 10.4, or Mac OS X 10.5 printer software is not set to use black ink only.
|
|
•
|
|
•
|
|
•
|
Try changing the Gamma setting in your Windows, Mac OS X 10.3 and 10.4 or Mac OS X 10.5 printer software.
|
|
•
|
Your printed colors can never exactly match your on-screen colors. However, you can use a color management system to get as close as possible. Try using ICM (Windows) or ColorSync (Mac OS X 10.3 and 10.4).
|
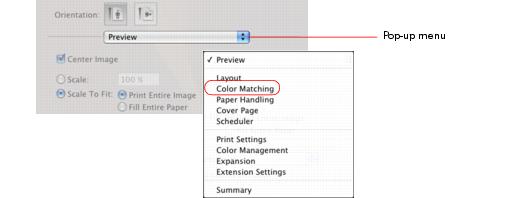
In Mac OS X 10.5, you can select ColorSync from the Color Matching pop-up menu.