If your printed design is not positioned on your disc correctly, you can adjust the print position using an extra CD/DVD.
|
1.
|
Place the CD/DVD into the CD/DVD tray. Load the tray into the printer.
|
|
2.
|
|
3.
|
Select EPSON Stylus Photo RX680 Series.
|
|
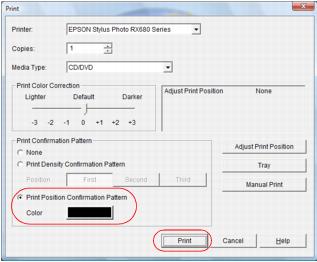
4.
|
Click Print Position Confirmation Pattern.
|
|
5.
|
Click Print to print the confirmation pattern on the check disc.
|
|
8.
|
|
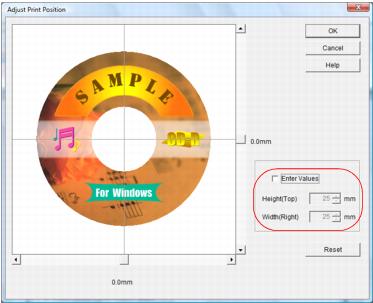
9.
|
Click Enter Values, then select the distance for A into the Height (Top) box and the distance for B in the Width (Right) box.
|
|
10.
|
Click OK.
|
|
2.
|
|
3.
|
Make sure your Stylus Photo RX680 is selected.
|
|
4.
|
Click Print Position Check Pattern.
|
|
5.
|
Click Print to print the confirmation pattern on the check disc.
|

|
8.
|
Click Position Adjustment.
|

|
9.
|
Click Value Entry, then select the distance for A into the Top Space box and the distance for B in the Right Space box.
|
|
10.
|
Click OK.
|