After opening your file for printing, open the Print window to select your print options.
|
1.
|
|
2.
|
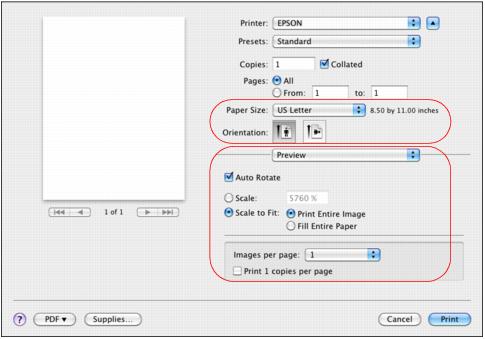
Select your product as the Printer setting.
|

|
3.
|
Click the
|
|
4.
|
Note:
If you don’t see these settings here, check for them in your application before printing. For example, you may be able to select them by opening the File menu and selecting Page Setup.
If you don’t see these settings here, check for them in your application before printing. For example, you may be able to select them by opening the File menu and selecting Page Setup.
|
5.
|
Select any settings that are specific to the application you’re using. For example, if you’re printing from Preview, you see the application settings shown above.
|
|
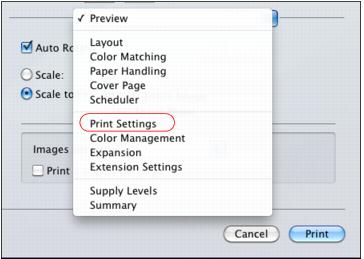
6.
|
Select Print Settings from the pop-up menu.
|
|
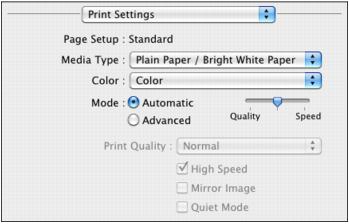
7.
|
Select the Media Type setting that matches the paper you loaded.
|
|
8.
|
Select Color or Black/Grayscale output in the Color pop-up menu. If you select Black/Grayscale, some color ink will still be used for print head maintenance.
|
|
9.
|
|
10.
|
Move the Quality/Speed slider as necessary to select higher quality or faster print speed.
|
|
•
|
Adjust the amount of image expansion when printing borderless photos
|