You can copy a photo onto 4 × 6-inch, 5 × 7-inch, 8 × 10-inch, or letter-size Epson special paper (various types available) for instant photo reprints.
|
1.
|
Place your original photo on the scanner glass. (Do not place photos in the Automatic Document Feeder.)
|
|
2.
|
Load Epson photo paper in the sheet feeder.
|
|
3.
|
|
4.
|
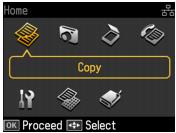
Press OK.
|
|
5.
|
|
6.
|
|
8.
|
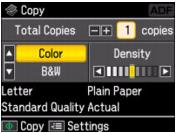
To change any of the settings displayed on the screen, press Menu. Then press OK to select Paper and Copy Settings.
|
|
•
|
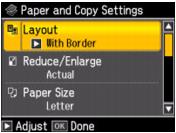
To change the layout, press
|
Select With Border to leave a small margin around the image, select Borderless to expand the image all the way to the edge of the paper (slight cropping may occur), or select 2-up Copy to copy 2 images on a sheet of paper.
|
•
|
To adjust the copy size, press
|
Choose Actual (to select a percentage using + or –), Auto Fit Page (to automatically size the image to fit your paper), or any of the specific sizing options offered.
|
•
|
To change the paper size, press
|
|
•
|
To change the paper type, press
|
|
•
|
To adjust the amount of image expansion when printing borderless photos, press
|
|
•
|
You can also select the Document Type and Quality. (Draft quality is available for plain paper only.)
|
|
10.
|
Press
|
To cancel copying, press  Stop/Clear Settings.