Follow the instructions in these sections to select settings as necessary for your type of original:

|
1.
|
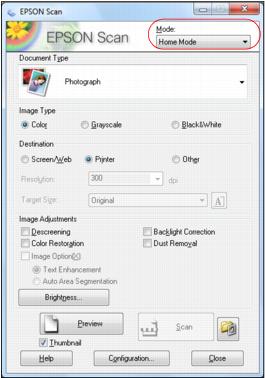
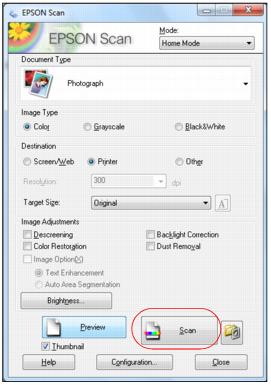
Select the type of original you’re scanning as the Document Type, such as Photograph or Text/Line Art.
|
|
2.
|
|
1.
|
Select the way you plan to use your scanned image as the Destination. The Resolution setting is selected based on the Destination you choose.
|
Screen/Web: For images you will e-mail, view on a computer screen, or post on the web.
Printer: For images you will print or documents you are converting to editable text (OCR).
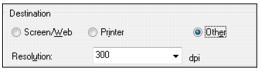
Other: For images that you want to select a custom resolution for.
|
2.
|
|
1.
|
|
2.
|
Select your Resolution based on how and when you will enlarge your image.
|
If you plan to enlarge the image so you can print it at a larger size, you may need to increase the resolution. Follow these guidelines:
|
•
|
You will enlarge the image as you scan it.
If you will enlarge the images in Epson Scan using the Target Size setting (Home and Professional modes only) you don’t need to increase the Resolution setting. |
|
•
|
You will scan the image at its original size, but then enlarge it later in an image-editing program.
If you will enlarge your images later in an image-editing program, you need to increase the Resolution setting to retain a high image quality. Increase the resolution by the same amount you will increase the image size. For example, if the resolution is 300 dpi (dots per inch), and you will increase the image size by 200% later, change the Resolution setting to 600 dpi. |
If you are scanning at 100% or reducing the size, select your Resolution based on how you will use the scanned image:
E-mail/view on a computer screen/post on the web: 96 to 150 dpi
Print/convert to editable text (OCR): 300 dpi
Fax: 200 dpi
|
3.
|
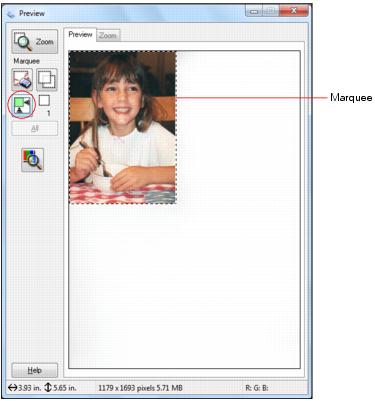
Now you can preview your image.
|
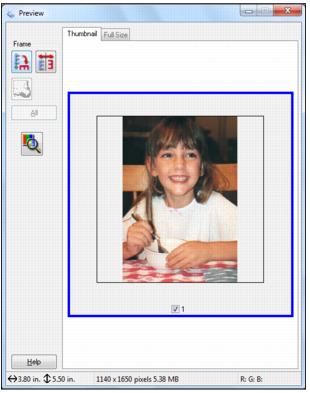
Thumbnail displays your previewed images as thumbnails with the scanned image area and exposure automatically selected. If the Thumbnail checkbox is checked, clicking the Preview button opens a thumbnail preview.
Normal displays your previewed images in their entirety so you can select the scanned image area and other settings manually. If the Thumbnail checkbox is unchecked, clicking the Preview button opens a normal preview.
|
1.
|
Click the Preview button to preview your images in a new Preview window.
|
|
2.
|
To rotate or flip the image (thumbnail preview only), click the thumbnail and click the
|
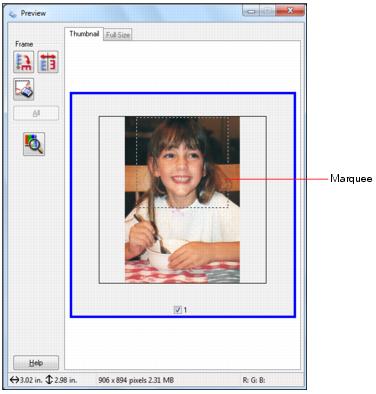
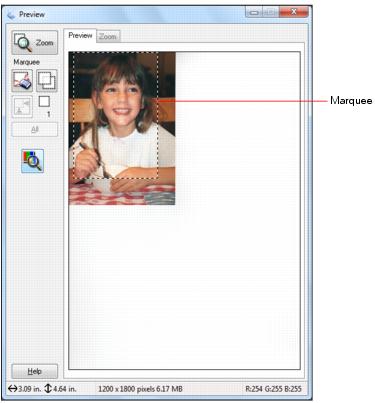
You can adjust the scanned image area by creating and/or moving the dotted line (marquee) outlining the scan area:
|
•
|
Thumbnail preview: Create a marquee by placing your cursor in one corner of the desired scan area, clicking, and dragging the cursor to the opposite corner.
|
|
•
|
Normal preview: Click the
|
|
3.
|
To resize a marquee, place the cursor over a marquee edge or corner, then click and drag the edges where you want them.
|
|
4.
|
In Normal Preview mode, you can create up to 50 marquees at a time. Click the
|
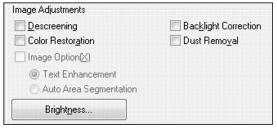
You can adjust exposure, brightness, and other image quality settings before you scan to improve your results.
|
Removes the rippled pattern that can appear in subtly shaded image areas, such as in skin tones. Also improves results when scanning magazine or newspaper images. The results of descreening do not appear in the preview image, only in your scanned image.
|
|
|
Backlight Correction
|
|
|
Text Enhancement
|
Sharpens the appearance of letters in text documents. (Available only when you select Text/Line Art, Newspaper, or Magazine as the Document Type setting.) Check the Image Option box, then select the setting.
|
|
Auto Area Segmentation
|
Makes grayscale images clearer and text recognition more accurate by separating the text from the graphics. (Available only when you select Text/Line Art, Newspaper, or Magazine as the Document Type setting and Black&White as the Image Type.) Check the Image Option box, then select the setting.
|
|
Adjusts the level at which the black areas in text and line art are delineated, improving text recognition in OCR programs. (Available only when you select Black&White as the Image Type setting.) Click the Brightness button to access the setting.
|
|
|
Adjusts the difference between the light and dark areas of the overall image. Click the Brightness button to access the Contrast setting.
|
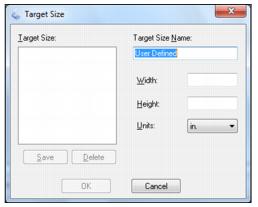
You can scan images at their original size, or reduce or enlarge them as you scan them. You can also select a specific scan size (such as 8 × 10 inch [203 × 254 mm] for photos) so you can crop the image using the correct proportions.
|
1.
|
Preview your original image.
|
|
2.
|
Select the size you want your scanned image to be from the Target Size list.
|
|
3.
|
|
4.
|
Name the custom size, enter the size, click Save, and click OK. Then create a marquee on the preview image to define the scanned image area. The size is automatically proportioned.
|
|
1.
|
Click Scan.
|
Note:
If you started your scan from within a TWAIN-compatible scanning program, your scanned images open in the program window. Click Close to exit Epson Scan.
If you started your scan from within a TWAIN-compatible scanning program, your scanned images open in the program window. Click Close to exit Epson Scan.
|
2.
|
Select the scan file settings you want to use from the window that appears.
|
|
3.
|
Click OK.
|
|
5.
|
Now you can view and print your scanned images, attach them to an e-mail, or use them however you like.
|