Copying Photos

You can copy color or black-and-white photos onto specific sizes and types of paper, including Epson special papers, for instant photo reprints. You can also restore the colors in faded photos as you copy.
  1. Place your original photo on the scanner glass.
  2. Load the paper you want to print on.
    Note: Load only the recommended number of sheets.
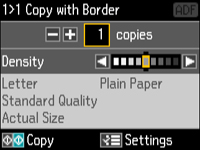
  3. Press the Copy button. You see this screen:


  4. Press the  Menu button, select Copy/Restore Photos, and press the OK button. You see this screen:


  5. To restore colors in faded photos as you copy, select On. If your photo or photos are not faded, leave this setting off. Then press the OK button.
  6. After you read the message, press the OK button to see how to place up to three photos on the scanner glass.
  7. Place up to three photos on the glass as shown on the LCD screen. For multiple photos, place them at least 0.2 inch (5 mm) apart.
  8. Press the OK button to prescan your photo or photos.
  9. When you see your scanned image on the LCD screen, you can do one of the following:
    • To print more than one copy of the photo, press the + or button to select the number (up to 99).
    • To crop or zoom into your photo, press the Display/Crop button.
    • If you're copying more than one photo, press the arrow buttons to select the next photo. Then repeat the selections above.
  10. Press the OK button to continue. You see a screen like this:


  11. To change any of the settings displayed on the LCD screen, press the  Menu button, select Paper and Copy Settings, press the OK button, and select the necessary settings.
  12. When you are ready to print, press one of the  Start buttons in the Copy section of the control panel.
    Note: To cancel printing, press the  Stop button.
Related references
Paper Type Settings - Copying
Paper Size Settings - Copying
Copying Options
Related information
Loading Paper
Placing Originals on the Product