Selecting Basic Print Settings - Mac OS X
10.5/10.6/10.7
Select the
basic settings for the document or photo you want to print.
Open a
photo or document for printing.
Select
the print command in your application.
Note: You may need
to select a print icon on your screen, the Print option in the File menu, or another command. See your
application's help utility for details.
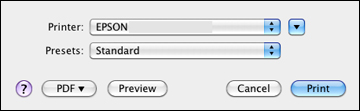
Select
your product as the Printer
setting.
If
necessary, click the arrow next to the Printer setting or the
Show Details button to expand the
print window. You see the expanded printer settings window
for your product:
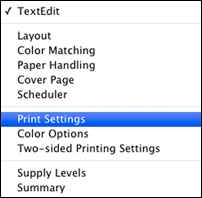
Note: The print
window may look different, depending on the version of Mac OS X and
the application you are using.
Select
the Copies and Pages settings as necessary.
Note: If you do
not see these settings in the print window, check for them in your
application before printing.
Select
the page setup options: Paper Size
and Orientation.
Note: If you do
not see these settings in the print window, check for them in your
application before printing. They may be accessible by selecting
Page Setup from the File
menu.
Select
any application-specific settings that appear on the screen, such
as those shown in the image above for the Preview
application.
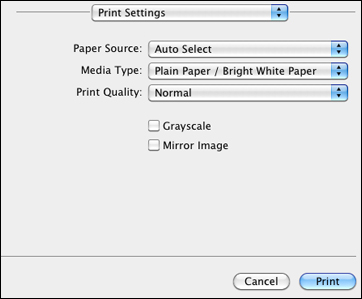
Select
Print Settings from the pop-up
menu.
You see these settings:
Select
the Paper Source setting that
indicates where you loaded the paper you want to print
on.
Select
the type of paper you loaded as the Media
Type setting.
Note: Check the
paper type settings list for details.