Network
administrators can install SNMP (Simple Network Management
Protocol) software on network computers so they can monitor
projectors. If your network uses this software, you can set up the
projector for SNMP monitoring.
Press
the Menu button.
Select
the Network menu and press
Enter.
Select
Network Configuration and press
Enter.
Do one
of the following:
PowerLite
1940W/1950/1960: Select the Others
Menu and press Enter.
PowerLite
1945W/1955/1965: Select the Administrator
Setting menu and press Enter,
then select the SNMP menu and press
Enter.
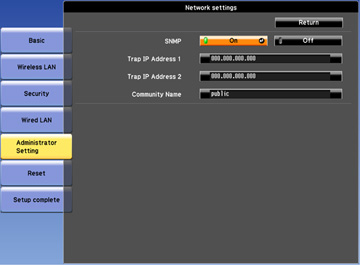
PowerLite 1940W/1950/1960
PowerLite 1945W/1955/1965
Select
the SNMP menu and press Enter (PowerLite 1945W/1955/1965).
Enter up
to two IP addresses to receive SNMP notifications, using 0 to 255
for each address field.
Note: Do not use
these addresses: 127.x.x.x or 224.0.0.0 through 255.255.255.255
(where x is a number from 0 to 255).
If your
network environment uses an AMX controller, turn on the
AMX Device Discovery setting to
allow the projector to be detected (PowerLite
1940W/1950/1960).
If your
network environment uses a Crestron RoomView controller, turn on
the Crestron RoomView setting to
allow the projector to be detected (PowerLite
1940W/1950/1960).
If you
are connecting to a network using Bonjour, turn on the Bonjour setting (PowerLite
1940W/1950/1960).
If you
want this projector to receive broadcasted messages over the
network, turn on the Message
Broadcasting setting. Administrators can broadcast messages
over the network using the Message Broadcasting plug-in for EasyMP
Monitor (PowerLite 1940W/1950/1960) (Windows
only).
When you
finish selecting settings, select Complete or Setup
Complete and follow the on-screen instructions to save your
settings and exit the menus.