You can load
card stock, envelopes, and other thick media in the rear paper feed
slot.
Note: Paper that
is too stiff may not load correctly even if it is within the paper
specifications.
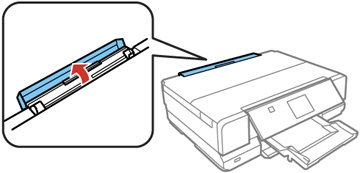
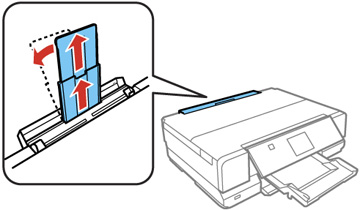
- Flip open the rear paper feed slot cover.
- Extend the paper support and tilt it back.
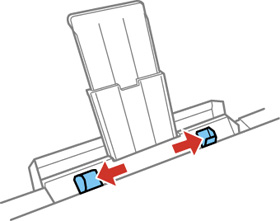
- Slide the edge guides outward.
- Do one
of the following:
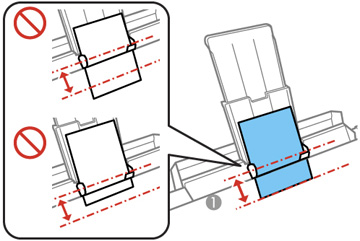
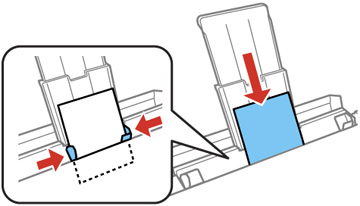
- Load a single sheet of paper or thick media, printable side up and short edge first, in the center of the rear paper feed slot until you hear a beep. Slide the edge guides against the paper, but not too tightly.
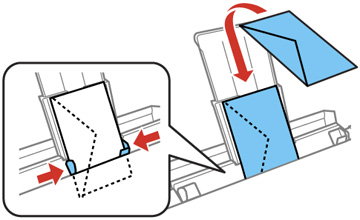
- Load an envelope, short edge first with the flap facing down, in the center of the rear paper feed slot until you hear a beep. Slide the edge guides against the envelope, but not too tightly.
- When you
are ready to print, press the
 start button.
Note: To cancel printing, select Cancel. If the Button Press setting is turned off, you do not hear a beep when inserting paper.
start button.
Note: To cancel printing, select Cancel. If the Button Press setting is turned off, you do not hear a beep when inserting paper.
Always follow
these loading guidelines:
- Load one sheet or envelope at a time.
- Be careful not to
insert paper too far or not far enough. Feed about 2 inches (5 cm)
of paper into the printer as shown.
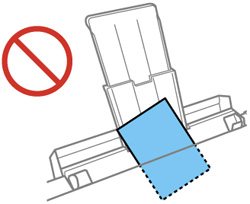
1 2 inches (5 cm) - Do not insert paper at an angle, or it may cause a paper jam or wrinkle your printout.
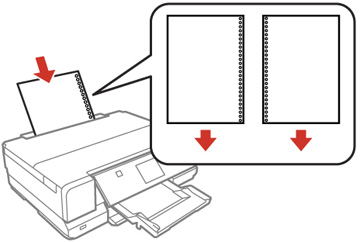
- You can load hole-punched paper with holes on either side, but you may need to adjust the margins in your print file to avoid printing over the holes.
- Check the paper package for any additional loading instructions.