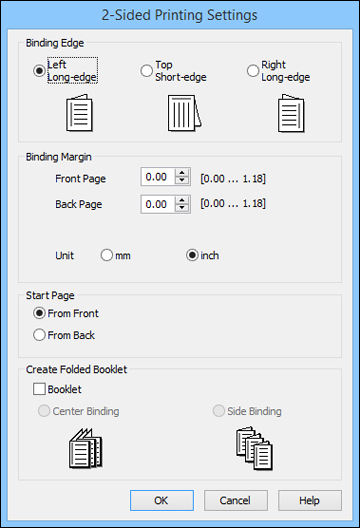
Selecting Double-sided Printing Settings - Windows

You can print on both sides of the paper by selecting the 2-Sided Printing checkbox on the Main tab.
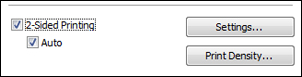

Note: Some options may be pre-selected or unavailable, depending on other settings you have chosen or if you are accessing the product over a network.
  1. Select the 2-Sided Printing checkbox.
  2. If the Auto checkbox is not automatically selected, do one of the following:
    • Select the Auto checkbox to automatically print your double-sided print job.
    • Deselect the Auto checkbox to print your double-sided print job manually by printing one side and flipping the paper over to print the other side (recommended for paper types that do not support automatic duplexing).
  3. Click the Settings button. You see this window:


  4. Select the double-sided printing options you want to use.
  5. Click OK to return to the Main tab.
  6. Click the Print Density button. You see this window:
  7. Select the type of document you are printing as the Document Type setting. The software automatically sets the Adjustments options for that document type.
  8. If necessary, select the Adjustments options you want to use.
  9. Click OK to return to the Main tab.
  10. Print a test copy of your double-sided document to test the selected settings.
  11. Follow any instructions displayed on the screen during printing.
Related tasks
Selecting Basic Print Settings - Windows