Before
faxing, select the current date, time, and daylight saving phase in
your area, and choose your preferred date and time format.
Note: This
setting can be locked by an administrator. If you can't access or
change this setting, contact your administrator for
assistance.
- Press the
 home button, if
necessary.
 - Select Setup.
- Scroll down and select System Administration. Enter the administrator password, if necessary.
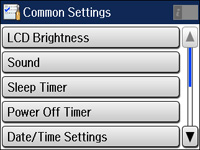
- Select Common Settings.
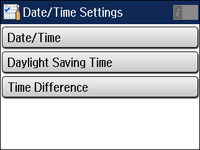
- Select Date/Time Settings. You see a screen like this:
- Select Daylight Saving Time.
- Select the setting that applies to your area:
- Winter: it is winter or your region does not use Daylight Saving Time (DST)
- Summer: it is spring or summer and your region uses Daylight Saving Time (DST)
Note: If your region uses Daylight Saving Time (DST), you must change this setting to match the season. When you change from Winter to Summer, your product automatically sets its clock ahead one hour. When you change from Summer to Winter, it sets its clock back one hour. - Select Date/Time.
- Select the date format you want to use.
- Use the numeric keypad to enter the current date.
- Select the time format you want to use.
- Use the numeric keypad to enter the current time.


