Creating Equipment Management Labels in
Label Editor
You can
select from several templates for equipment management labels and
modify the templates as necessary. You can create a series of
equipment management labels by entering the text manually or by
importing it from a file.
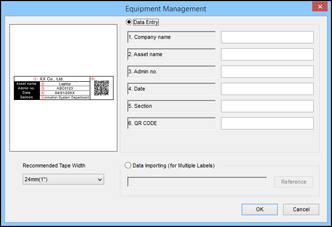
On the
New/Open screen, select Equipment
Management and click OK. You see this window:
Scroll
down to view the available templates, select the one you want to
use, and click OK. You see a
window like this:
Do one
of the following:
Select
Data Entry, enter the text for each
field, and click OK.
Select
Data Importing (for Multiple
Labels), click Reference, and
select the data file you want to use. Follow the instructions for
importing data.
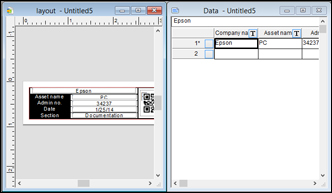
You see a screen like this:
Do any
of the following:
To edit the
default field labels, double-click each text block and enter the
text you want.
To format the
text you entered, double-click it on the layout window.
To create
additional labels using the same template, enter the text in the
Data window. After you complete each row, a blank row appears below
it.
To save
your label project, click the Save
icon, enter a file name, and click Save.
Click
the Print icon.
Select
the number of copies and any other settings you want.