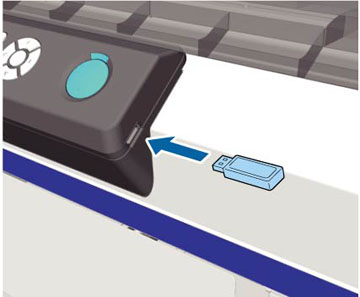
- Make
sure the
 power light is not flashing.
- Connect the USB memory device containing the saved data to the USB memory port on the control panel.
- Load the
T-shirt on the platen and press the
 start button.
Note: If you press the
start button.
Note: If you press the maintenance button while the
start light is on, you can
select Nozzle Check or Head Cleaning without canceling the print job.
If you select Nozzle Check from the
menu, the check pattern is printed at the platen size displayed on
the control panel screen. If you highlight Reset Print Count, you can clear the counter for
the number of copies displayed on the control panel.
maintenance button while the
start light is on, you can
select Nozzle Check or Head Cleaning without canceling the print job.
If you select Nozzle Check from the
menu, the check pattern is printed at the platen size displayed on
the control panel screen. If you highlight Reset Print Count, you can clear the counter for
the number of copies displayed on the control panel. - To print
different data, press the
 cancel button to cancel printing
the current data.
Note: To delete data from a USB memory device, select Delete Print File in step 5 above, and press the up or down arrow button to select the data you want to delete. Follow the instructions on the LCD screen to continue.
cancel button to cancel printing
the current data.
Note: To delete data from a USB memory device, select Delete Print File in step 5 above, and press the up or down arrow button to select the data you want to delete. Follow the instructions on the LCD screen to continue.