If
you cannot install the projector directly in front of the screen,
you can adjust the position of the projected image using the lens
shift feature.
Note: Wait 30
minutes after turning on the projector before setting the focus,
zoom, and lens shift for maximum accuracy.
- Press the Lens button on the control panel or remote control.
-
Press the arrow buttons on the remote control or use
the thumbstick on the control panel to adjust the position
of the projected image as necessary.
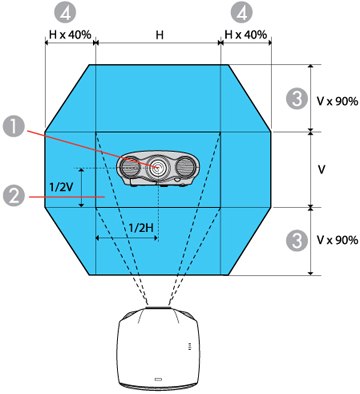
1 Center of lens 2 Projected image when lens shift is set in the center 3 Maximum vertical range (V × 90%) 4 Maximum horizontal range (H × 40%) Note: You cannot move the image to both the horizontal and vertical maximum values.