The
printer's White ink tubes can build up sediment, causing the
whiteness to decline or become uneven if you continue printing with
white ink. For best results, wash the white ink tube periodically.
A message appears on the control panel when the White ink tube
needs washing.
Note: Make sure to
clean the suction cap before performing the tube washing process.
You do not need to perform tube washing for color ink. However,
tube washing can help to clear clogged nozzles if they are not
cleared even after performing head cleaning several times. If this
is the case, try washing the tubes for the target ink.
Before you clean the ink tube, you may want to have new ink and cleaning cartridges handy (in case you run out of ink) and a new waste ink bottle (if a message prompts you that there is not enough free space in the current bottle).
Note: If you start
the tube washing process and do not have enough cleaning liquid in
the cartridges, you will not be able to use your printer until new
cleaning cartridges are installed.
- Press
the
 maintenance button. The
Maintenance menu appears.
maintenance button. The
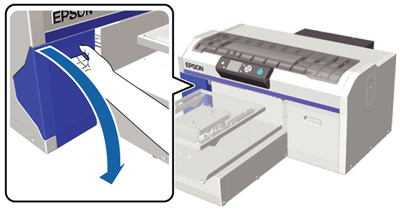
Maintenance menu appears. - Open the left ink cartridge cover.
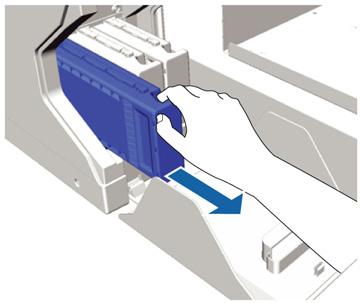
- Place
your finger in the indentation on top of the ink cartridge and pull
it straight out.
Note: Removed ink cartridges may have ink around the ink supply port, so be careful not to get ink on the surrounding area.
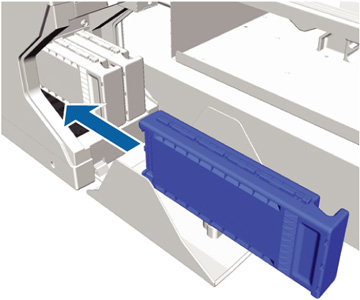
- Hold a
cleaning cartridge with the label side facing the side of the
printer and slide it all the way into the slot.
Note: Do not touch the IC chip on the top of the cartridge, or the cartridge may not be recognized or the printer may not print properly.
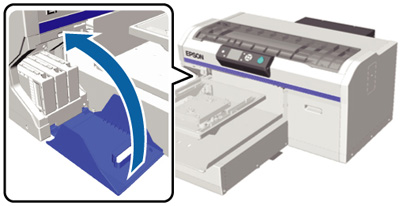
- Close the ink cartridge cover.