You can set up or install your projector in the following
ways:
Front

Rear

Front/Ceiling mounted
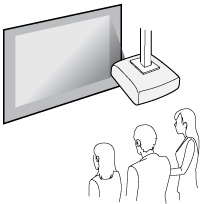
Rear/Ceiling mounted

Note: Be sure to
leave at least 20 inches (50 cm) of space in front of the air
exhaust and intake vents and, when setting up multiple projectors,
20 inches (50 cm) of space between the projectors.
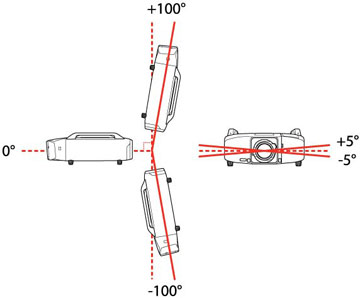
If you mount the projector for standard lamp use,
you can tilt it at the following angles:
-
Vertically:
Any angle up to ±100°.
-
Horizontally:
Within the range of ±5°.
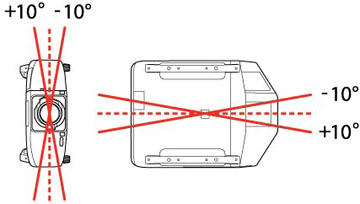
If you mount the projector for portrait lamp use,
you can tilt it at the following angles:
-
Vertically:
Any angle up to ±10°.
-
Horizontally:
Within the range of up to ±10°.
Note: The optional
installation frame (ELPMB44) and portrait lamps (ELPLP83/ELPLP84)
are required when using portrait projection. Be sure to mount the
projector with the air intake vent facing down and at least 4
inches (10 cm) of space between the projector and the mounting
surface as shown.
If you project from the ceiling, remove the
projector's feet and attach the foot covers as shown.
Note: Do not
remove the projector's handles.
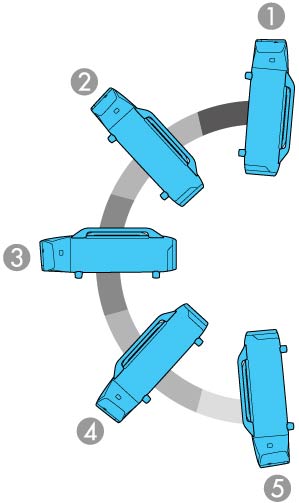
Set the
Direction
setting in the Extended menu to one of the following settings so
that operations on the screen match the control panel button
commands.
| 1 |
Pointing
Up
|
| 2 |
Angled Up
|
| 3 |
Normal
|
| 4 |
Angled Down
|
| 5 |
Pointing Down
|