You can scan
an image using your product's control panel buttons.
Your product automatically selects suitable default scan settings, but you can view or change them as necessary.
- Make sure you installed the product software and connected the product to your computer or network.
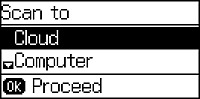
- Press the up or down arrow button, select Scan, and press the OK button. The scan options are displayed:
- Press the up or down arrow buttons to select a scan option
and press the OK button.
- Cloud sends your scanned files to a destination that you have registered with Epson Connect.
- Computer saves your scan as a JPEG file to your computer or as an image capture in OS X.
- Computer (WSD) lets you manage network
scanning in Windows 7 or Windows Vista (English only).
Note: To use this feature, you must first set up WSD (Web Services for Devices) on the computer you want to scan to.
- To scan to your computer, you first need to select how you
connected your product to your computer:
- If your product is connected directly to your computer with a USB cable, press the up or down arrow buttons to select USB Connection.
- If your product is connected to your computer over a network, press the up or down arrow buttons to select the computer name from the list and press the OK button to begin scanning.
- Press the
 Color button to start
scanning.
Color button to start
scanning.