You can
project from a computer, tablet, video device, or other source and
add notes to your projected content using the interactive pens or
your finger (BrightLink Pro 1430Wi). You can use one
pen, both pens at the same time, or a combination of pens and
finger touch (BrightLink Pro 1430Wi).
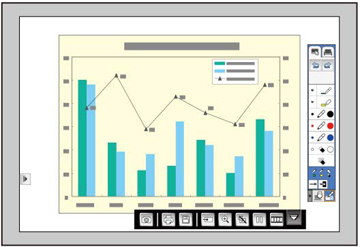
- Hover
near or tap the board or projected image with the interactive pen
or your finger (BrightLink Pro 1430Wi). Tap the
 annotation icon on the
toolbar. You see the main toolbar on the side and the
projection control toolbar on the bottom of the projected image.
annotation icon on the
toolbar. You see the main toolbar on the side and the
projection control toolbar on the bottom of the projected image.
- To move
the main toolbar to the other side of the screen, tap the
 arrow on the
opposite side of the screen.
Note: You can use the pen or your finger (BrightLink Pro 1430Wi) to move the arrow icon up or down to reposition the toolbar.
arrow on the
opposite side of the screen.
Note: You can use the pen or your finger (BrightLink Pro 1430Wi) to move the arrow icon up or down to reposition the toolbar. - To switch to one of the other interactive modes, do one of the following:
- To close
the main toolbar, select the
 icon at the
bottom of the toolbar.
icon at the
bottom of the toolbar.
- To show
or hide the projection control toolbar, select the
 arrow.