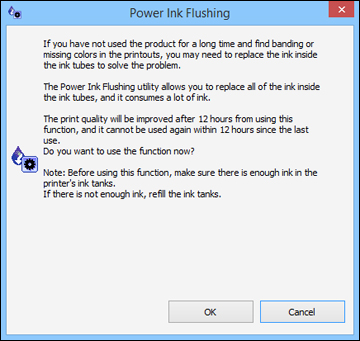
Flushing the Ink Tubes Using a Computer Utility

You can use the Power Ink Flushing utility to flush the ink tubes.
Note: After flushing the ink tubes, you must turn off the product and wait at least 12 hours before printing again.

Before you begin, make sure no product lights are indicating errors.

  1. Do one of the following:
    • Windows: Access the Windows Desktop and right-click the product icon in the Windows taskbar and select Printer Settings. Then click the Maintenance tab.
    • OS X: In the Apple menu or the Dock, select System Preferences. Select Print & Fax, Print & Scan, or Printers & Scanners, select your product, and select Options & Supplies. Select Utility and select Open Printer Utility.
  2. Click the Power Ink Flushing button. You see a window like this:


  3. Follow the on-screen instructions to flush the ink tubes.
  4. When you finish flushing the ink tubes, turn off the product and wait at least 12 hours before printing.
  5. Print a document and check the print quality. If the print quality did not improve, contact Epson for support.
Related information
Refilling Ink