You can forward received faxes to
another fax machine, or convert the faxes into PDF documents and
forward them to a shared folder on the network or to an email
address.
Note: You
cannot forward color faxes to another fax machine. Forwarded faxes
are deleted from the product's memory. Before using this feature,
make sure the date and time are set correctly, the forwarding
destination is set up in the contact list, and the email server
settings are configured.
- Press the
 home button, if
necessary.
home button, if
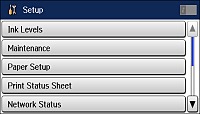
necessary. - Select Setup.
- Scroll down and select System Administration. Enter the administrator password, if necessary.
- Select Fax Settings > Output
Settings > Fax Output > Settings > Forward and
select Yes.
Note: If you want to print the fax automatically before forwarding it, select Yes and Print.
- Select Other Settings.
- Select Where to Forward.
- Select up to 5 forwarding
destinations from the contact list.
Note: Select View to sort your contacts by destination type.
- When you finish, select Proceed.
- Confirm the displayed destinations are correct and select Close.
- Select Options When Forwarding Failed.
- Select the option to use if received faxes cannot be forwarded: print the faxes or save them in the printer's inbox.
- If you are forwarding to an email address, select
Email Subject to Forward to enter
an email subject.
Note: If you are forwarding faxes to a shared folder on the network or an email address, you can test if fax forwarding was set up correctly by sending a scanned image to the destination using the scan to email or scan to network folder/FTP option. If you are forwarding faxes to a shared folder on the network, you can set up FAX Utility to notify you whenever a new fax is received.