- Turn off the product, unplug the power cord, and
disconnect any connected cables.
Warning: To avoid electric shock, make sure you unplug the power cord.
- Uninstall any optional cassette units already installed on
the product.
Note: To uninstall any optional cassette units, turn off the product, unplug the power cord, disconnect any cables, and follow the rest of these instructions in reverse.
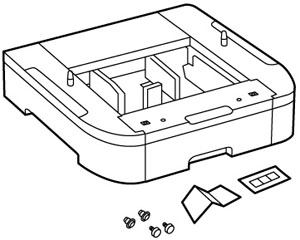
- Remove the paper cassette unit from its packaging and remove any protective materials.
- Make sure you have all the items shown here:
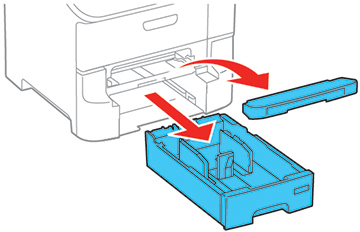
- Remove the output tray and paper cassette from the product.
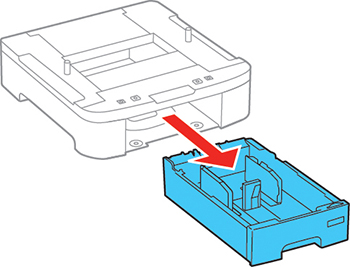
- Remove the paper cassette from the optional paper cassette unit.
- Stack all optional paper cassette units on top of each other and secure them to each other with the included screws.
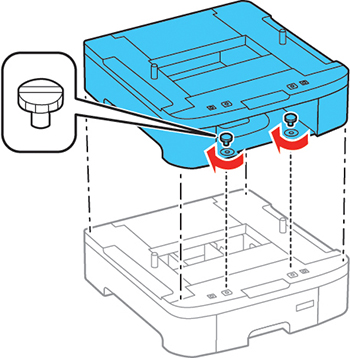
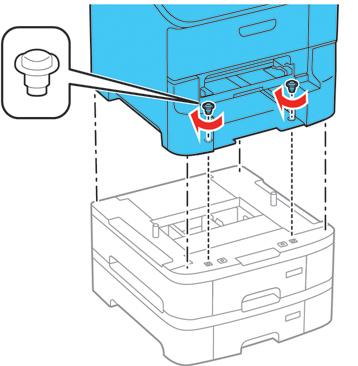
- Lift up your product and gently lower it onto the paper cassette unit with the corners aligned. Secure the product to the paper cassette unit with the included screws using a screwdriver.
- Secure the back of the paper cassette units to each other and to the product using the included brackets and screws.
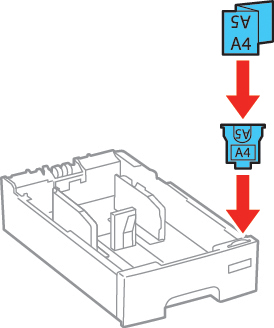
- Insert a label into the holder indicating the paper size to be loaded in each paper cassette.
- Place the correct sticker on each cassette unit to indicate the cassette number.
- Connect the power cord and other interface cables, then plug in the product.
- Turn on the product.
- Pull out and reinsert the paper cassette in each optional paper cassette unit to confirm the cassette unit is displayed on the Paper Setup screen.
- Enable the optional paper cassette units in the printer software.