You can load
paper up to this size in the lower paper cassette: Legal
(8.5 × 14 inches [216 × 356 mm]).
Note: Do not
remove or insert the paper cassette while the product is
operating.
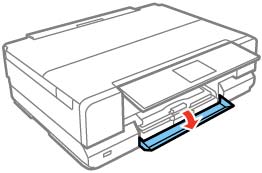
- Close
the output tray by pressing the
 Output
Tray button or by hand, if necessary.
Note: As you slide in the output tray, there may be slight resistance and noise. This is normal.
Output
Tray button or by hand, if necessary.
Note: As you slide in the output tray, there may be slight resistance and noise. This is normal. - Open the front cover.
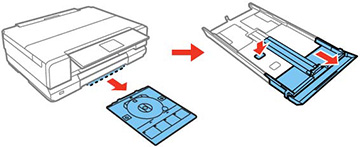
- Pull on the front cover to remove the lower paper cassette.
- Slide
the edge guides outward.
Note: If you are using legal-size paper, remove the CD/DVD tray from under the lower cassette. Press the button on the lower cassette and extend it as shown.
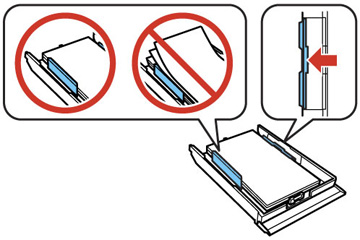
- Set the
front edge guide to the paper size you are using.
Note: Various paper sizes are marked on the tray.
- Insert
paper with the glossy or printable side down.
Note: Make sure the paper is loaded against the front edge guide and not sticking out from the end of the cassette.
- Slide
the side edge guides against the paper, but not too tightly.
Note: Make sure the paper is under the tabs on the edge guides.
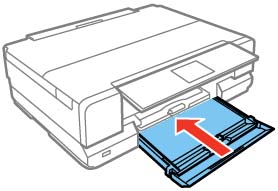
- Keep the
cassette flat as you insert it.
Note: The output tray opens automatically when you print. Leave enough space in front of the product for the paper to be fully ejected. Do not remove or insert the paper cassette while the product is operating.