- Load a few sheets of plain paper in the product.
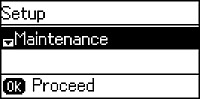
- Press the up or down arrow button, select Setup, and press the OK button. You see this screen:
- Select Maintenance and press the OK button.
- Select Print Head Alignment and press the OK button.
- Do one of the following:
- Press the Start
 Color button to print an
alignment sheet.
Note: Do not cancel printing while you are printing a head alignment pattern.
Color button to print an
alignment sheet.
Note: Do not cancel printing while you are printing a head alignment pattern. - Check the printed patterns on the alignment sheet and do
one of the following:
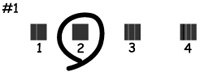
- If you printed a vertical alignment sheet, press the arrow buttons to select the number representing the most solid printed pattern from the first row of your alignment sheet, and press the OK button. Repeat these steps for each printed row on your alignment sheet.
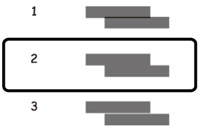
- If you printed a horizontal alignment sheet, press the arrow buttons to select the number representing the printed pattern with the least amount of separation or overlap, and press the OK button.