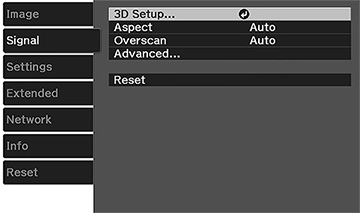
Normally the projector detects and optimizes the input signal settings automatically. If you need to customize the settings, you can use the Signal menu. The available settings depend on the currently selected input source.
To change settings for an input source, make sure the source is connected and select that source.
| Setting | Options | Description |
|---|---|---|
| 3D Setup | 3D Display
3D Format 2D-to-3D Conversion 3D Depth Diagonal Screen Size 3D Brightness Inverse 3D Glasses 3D Viewing Notice |
Selects various 3D options
3D Display: enables 3D mode 3D Format: selects the 3D format 2D-to-3D Conversion: converts 2D images to 3D images 3D Depth: sets the depth for the 3D image Diagonal Screen Size: selects the actual size of the screen to maximize the 3D effect 3D Brightness: adjusts the brightness of the 3D image Inverse 3D Glasses: reverses the images projected for the left and right eyes (enable only if 3D images are not displaying correctly) 3D Viewing Notice: enables the viewing notice displayed when 3D mode is activated |
| Aspect | See the list of available aspect ratios | Sets the aspect ratio (width-to-height ratio) for the selected input source; not available for HDMI HD signal sources |
| Tracking | Varying levels available | Adjusts signal to eliminate vertical stripes in computer images |
| Sync. | Varying levels available | Adjusts signal to eliminate fuzziness or flickering in computer images |
| Position | Up, down, left, right | Adjusts the image location on the screen |
| Auto Setup | On
Off |
Automatically optimizes computer image quality (when On) |
| Overscan | Auto
Off 4% 8% |
Changes the projected image ratio to make the edges visible by a selectable percentage or automatically (HDMI 1/HDMI2 only) |
| Advanced | HDMI Video Range
Image Processing |
HDMI Video Range
sets the video range to match the setting of the device connected
to the HDMI input port
Auto: detects the video range automatically Normal: for images from a device other than a computer; can also be selected if the black areas of the image are too brightExpanded: for images from a computer; can also be selected if the image is too dark Image Processing: adjusts how images are processed; Fast displays images more quickly and Fine displays images in higher quality |