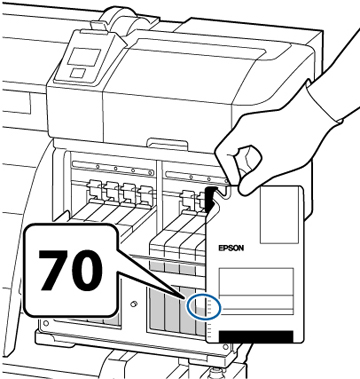
- When the
message Check Ink Levels appears on
the LCD screen, use the scale on the ink pack to check how much ink
is left in the ink tank.
If the remaining ink level is greater than 2.8 in. (70 mm) from the
base of the ink tank, continue to use the printer until the
remaining ink level is 2.8 in. (70 mm) from the base of the ink
tank so that you can use all the ink in a new ink pack to refill
the ink tank.
If the remaining ink level is 2.8 inches (70 mm) or less, go to the next step.
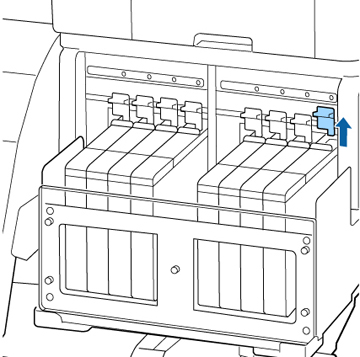
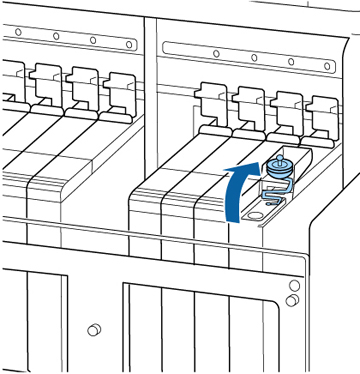
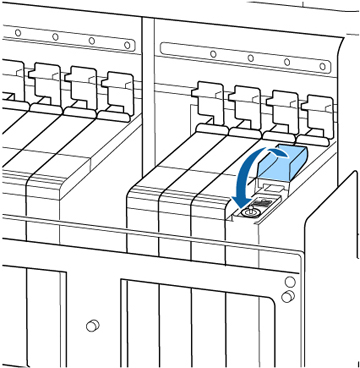
Note: When the message Refill Ink Tank is displayed on the control panel screen and the remaining ink level is greater than 2.8 in. (70 mm) from the base of the ink tank, it is time to replace the ink tank. The ink tank must be replaced because fine dirt, dust, and other foreign material causes the ink tank’s filter to malfunction. The ink tank replacement interval depends on the usage environment and conditions. Contact Epson Support for information on replacing components. - Lift the lock lever for the slider of the chip unit you intend to replace.
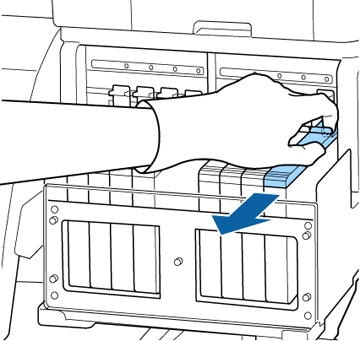
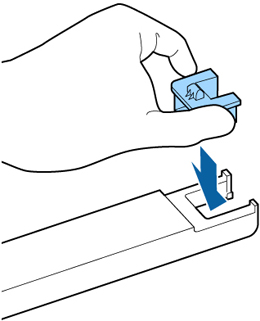
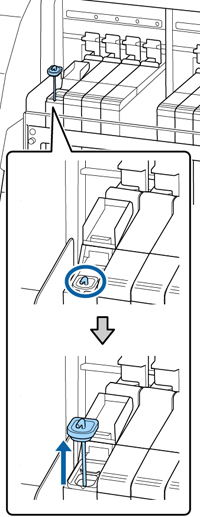
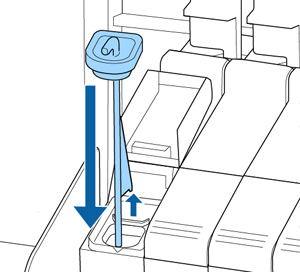
- Insert a
finger into the groove on the top of the slider and pull the slider
straight out.
Caution:Do not tilt the slider. If you drop the chip unit, it may break.
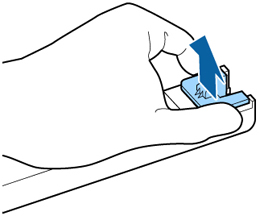
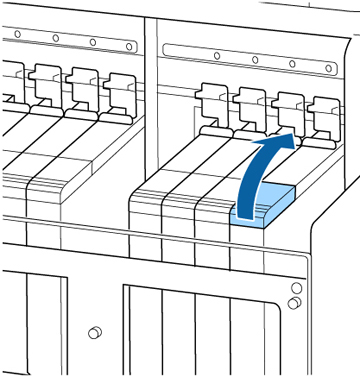
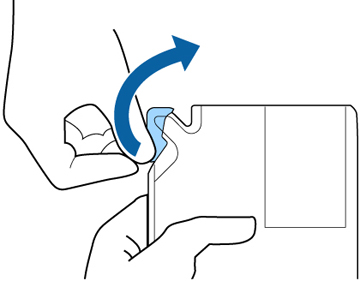
- Remove the chip unit from the slider.
- Confirm that the label color on the slider matches the label on the new ink pack. Then attach the chip unit supplied with the new ink pack to the slider.
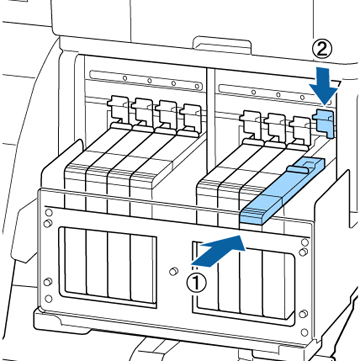
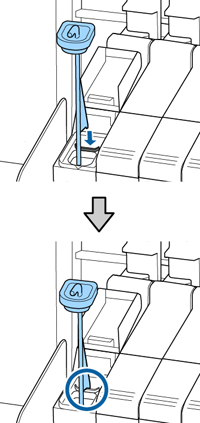
- Hold the slider level and insert it.
Lower the lock lever.
Caution:Do not push the slider in with too much force. Failure to observe this precaution could damage the printer.
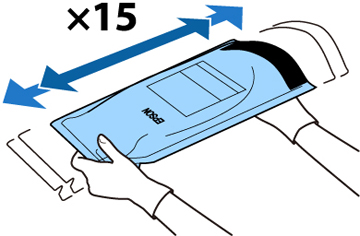
- Shake the new ink pack horizontally approximately 2 inches (5 cm) left and right for 5 seconds (approximately 15 times).
- Open the ink inlet cover.
- Do the following:
- For all ink colors except High Density Black ink, remove the ink inlet cap from the ink tank.
- For the High Density Black ink, grasp the loop at the top of the ink inlet cap and slowly remove the ink inlet cap. Rest the stirring stick on the tab at the edge of the tank as shown.
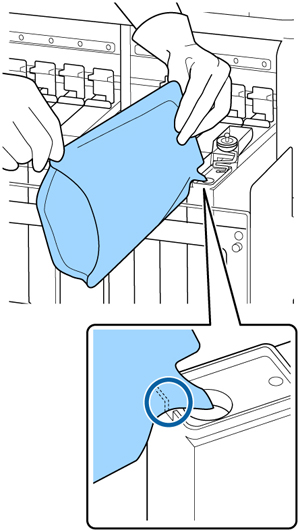
- Cut or tear off the ink pack spout seal.
- Insert the spout of the ink pack into
the groove and slowly tilt it to pour out the ink.
Note: Be sure to completely empty the ink pack into the tank. Do not use an ink pack to refill multiple ink tanks. This can prevent the proper display of messages from the remaining ink warning system.
- Do the following:
- For all ink colors except High Density Black ink, replace the ink inlet cap.
- For the High Density Black ink, lift up the stirring stick,
guide it into the ink tank, and replace the ink inlet cap as shown.
Caution:Press down the ink inlet cap firmly so it does not interfere with the slider and damage the ink inlet cap.
- Close the ink inlet cover.
Note: If ink adheres to the heat shield, clean the heat shield.