When you
see one of these messages on the product's LCD screen, you need to
replace the waste ink bottle:
- Prepare empty waste ink bottle
- Replace waste ink bottle and press OK
Wait until the product is not printing or cleaning the print heads before replacing the waste ink bottle.
Caution:
Replacing the waste ink bottle during printing
or cleaning could cause waste ink to leak. When replacing the waste
ink bottle, always wear the gloves included in the maintenance kit.
Leave the waste ink in the bottle for disposal and do not transfer
it to another container.
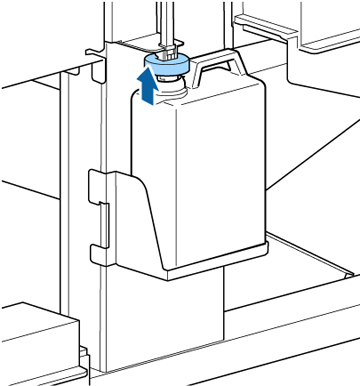
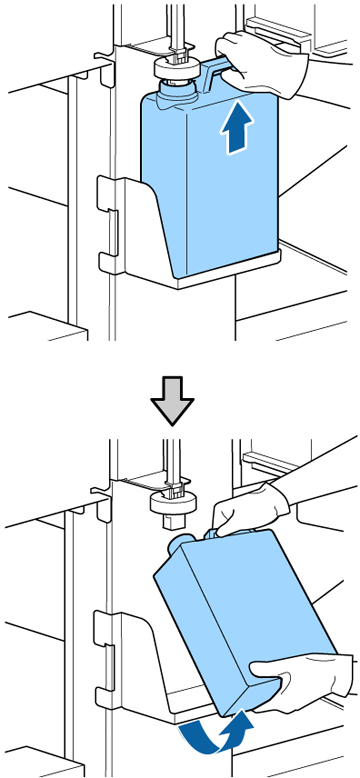
- Raise the ink splash guard on the waste ink bottle.
- Lift up the waste ink bottle and remove it from the holder as shown here.
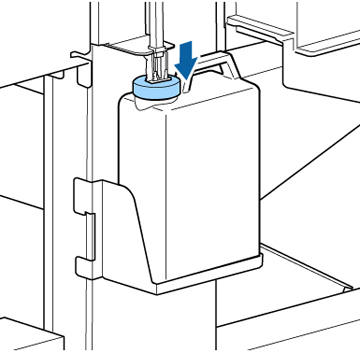
- Lower the ink splash guard onto the
waste ink bottle and make sure it firmly seals to the mouth of the
bottle.
Note: If the ink splash guard does not firmly seal, waste ink could spill onto your product.
- Press the OK button again to reset the waste ink counter.