Before
loading media in your printer, review and follow the media handling
guidelines for the best results.
Caution:
Wait until just before printing to load media.
This avoids creases in the media that may be caused by the pressure
rollers. Creased, wavy, or curled media could cause it to jam
inside the printer or contact the print head.
- Press
the
 power button and wait until you see
this message on the LCD screen: Load
media.
power button and wait until you see
this message on the LCD screen: Load
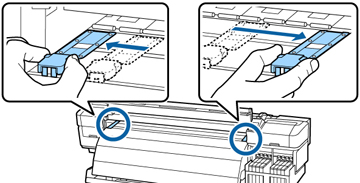
media. - Open the
front cover, grasp the tabs on the media holding plates, and slide
them out of the way.
Note: Move the media holding plates as shown, or your media may be damaged or not load into the printer.
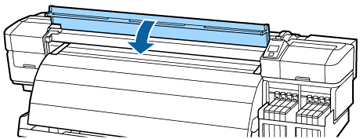
- Close the front cover.
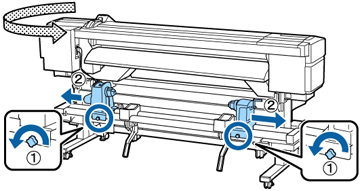
- On the back of the product, loosen the roll holder fixing screws and slide out the roll holders wider than your media width. Then center the roll supports between the roll holders.
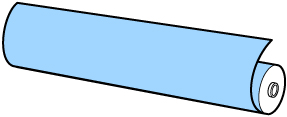
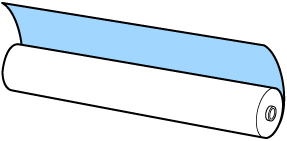
- Note which way the printable side of
the media is rolled: Printable side
out
Printable side in
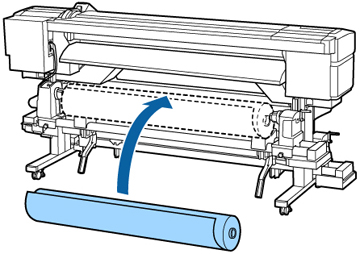
- Place your media on the roll supports temporarily.
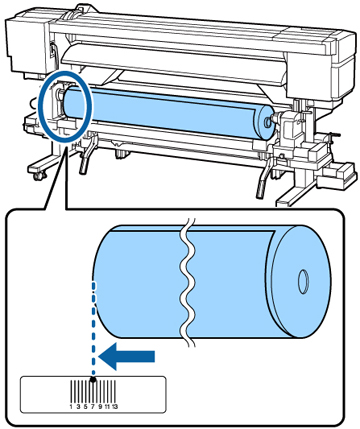
- Align the left edge of the media with
the position for that media on the label beneath the roll.
Note: If the label is missing the loading position you need, mark it on the label. Be sure to select the correct roll type setting on the product control panel.
- On the left side of the product, raise
the lift lever to lift the media into position. Then firmly push
the roll holder onto the roll core.
Note: If your roll is too small to lift into place with the lift lever, lift it onto the roll holders by hand.
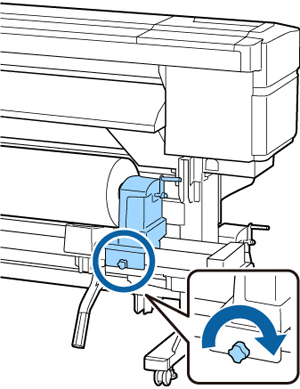
- Tighten the roll holder fixing screw until it no longer turns.
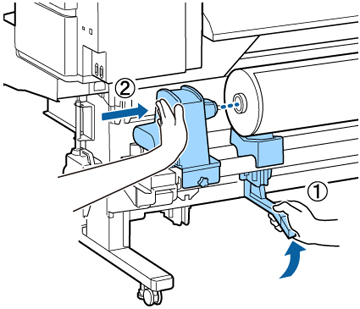
- On the right side of the product, raise the lift lever to lift the media into position. Then firmly push the roll holder onto the roll core.
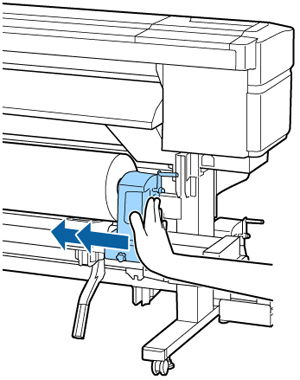
- Push the center of the roll holder
twice to securely insert it into the roll core.
Note: Make sure the roll holder is fully inserted into the roll core or media may not feed correctly and slip during printing, or cause banding in your printouts.
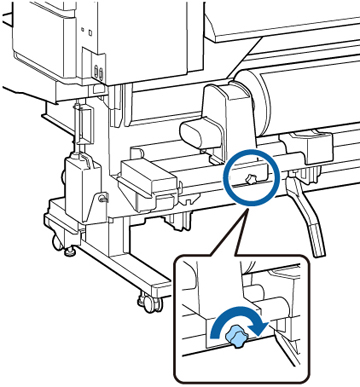
- Tighten the roll holder fixing screw
until it no longer turns.
Note: Make sure the fixing screw is fully secured or the roll holder may move during printing, causing banding in your printouts.
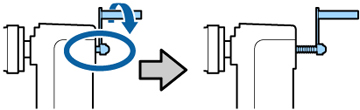
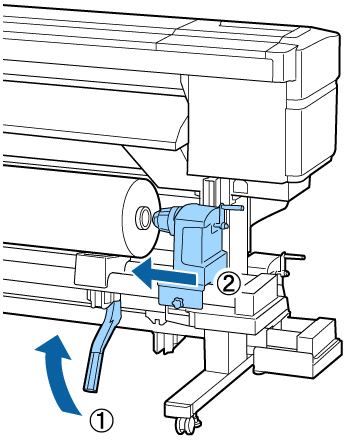
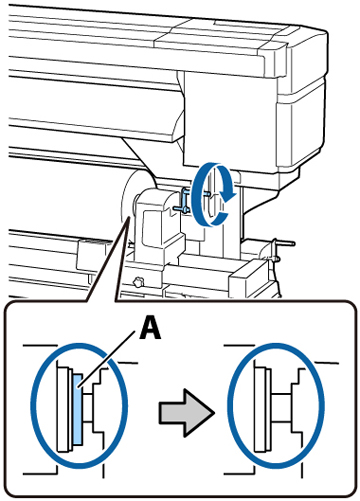
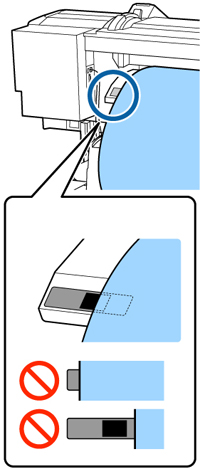
- Rotate the handle shown here until
part A is hidden from view, then stop turning the handle.
Caution:Once part A is hidden, do not turn the handle further or you may damage the roll holder. If part A remains visible after turning the handle fully, rewind the handle, loosen the fixing screw, and reload the right side of the roll on the product.
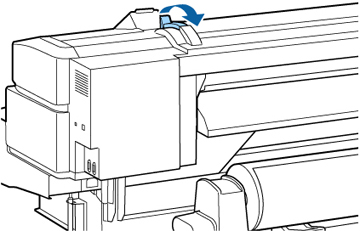
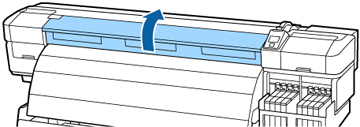
- Raise the media loading lever.
- Insert the approximately 11.8 inches (30 cm) of media into the opening in the product, then lower the media loading lever.
- Confirm that the left edge of the
media passes over some portion of the square on the loading guide
label as shown here.
Note: If the media does not pass over the square marked on the label, reverse these steps to remove the media and load it again. Do not reposition the roll holders while your media is loaded.
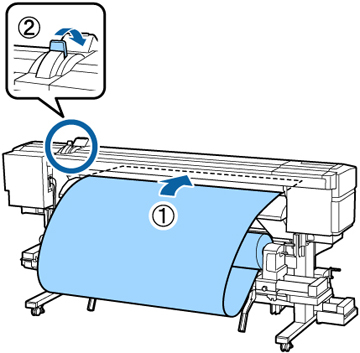
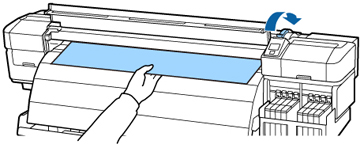
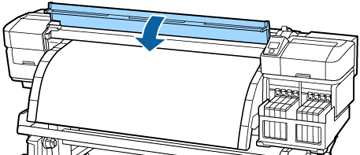
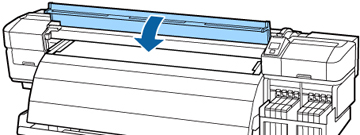
- On the front of the product, open the front cover.
- Hold the media in the center and raise the media loading lever.
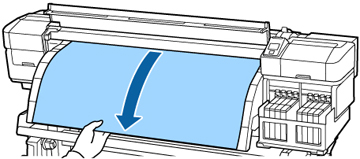
- Pull the media straight forward to the leading edge of the after heater.
- Close the front cover.
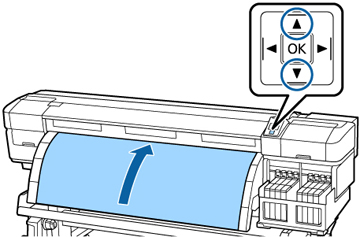
- Press the up or down arrow button on
the control panel to rewind the leading edge of the media to the
edge of the front cover. Then make sure the media is fed straight
and taut.
- For printable-side-out media, press the up arrow button.
- For printable-side-in media, press the down arrow button.
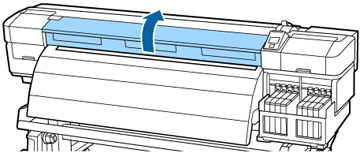
Note: For best results, press the right arrow button on the control panel to set the Media Suction setting to 2. - Open the front cover.
- Lower the media loading lever to hold the media in place.
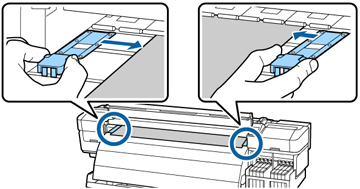
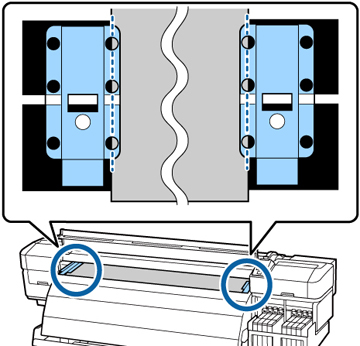
- Grasp the tabs on the media holding
plates on both sides and move the plates to the edges of the
media.
Caution:If your media is more than 0.02 inch (0.4 mm) thick, leave the media holding plates on the sides of the product or they could damage the print head.
- Adjust the media holding plates so the
round holes shown here are centered over the edges of the
media.
Note: Make sure to correctly position the media holding plates as shown here or your printouts may contain banding, uneven tint, or stripes. Do not use the media holding plates if the sides of your printouts are smudged or torn.
- Close the front cover.