After
adjusting the media feeding unit, you need to perform a similar
procedure on the auto take-up reel.
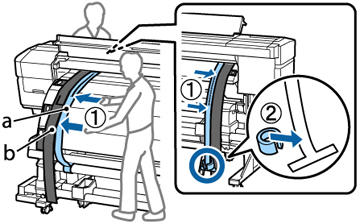
Two people are required for parallel adjustment: one in front of the printer and one in back.
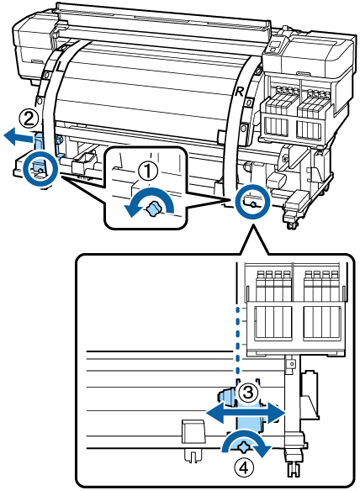
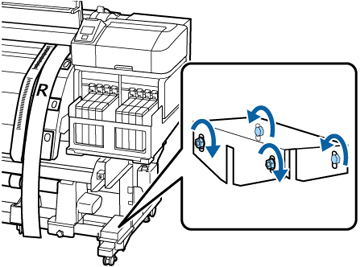
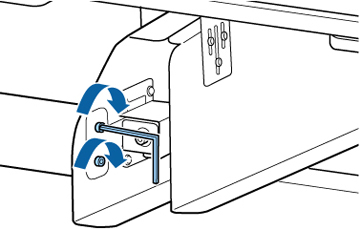
- Use the large hexagon wrench to loosen the four fixing screws on the front of the product as shown.
- Loosen the roll core holder locking screws and move the left roll core holder all the way to the left. Align the inside edge of the right roll core holder with the outside edge of the after heater, then tighten the right roll core holder locking screw.
- Insert the roll core with the alignment tool into the right roll holder. Then insert the left roll core holder into the roll core and tighten the roll core holder locking screw.
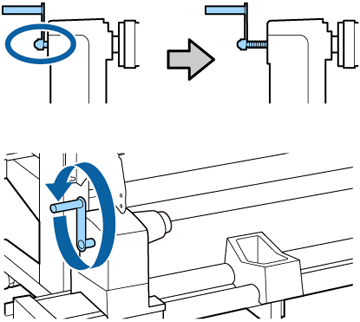
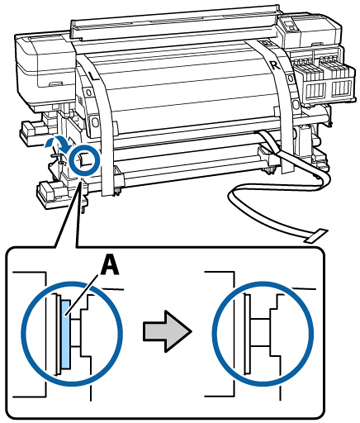
- Rotate the handle until part A is fully inserted as shown.
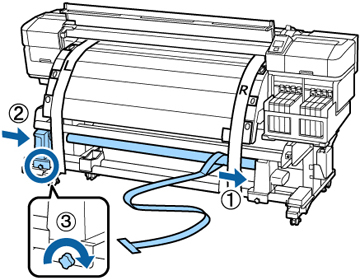
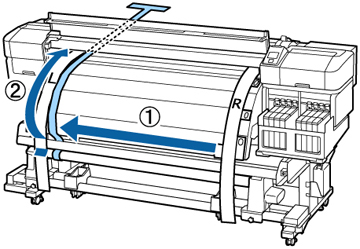
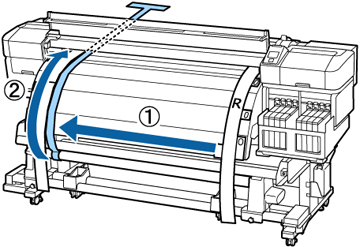
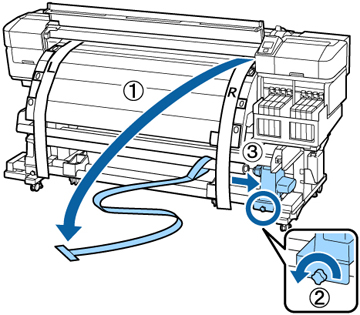
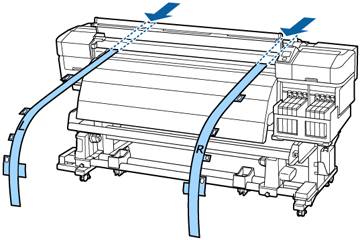
- Move the alignment tool to the left side and feed it through the paper path between the media guide bar and the after heater.
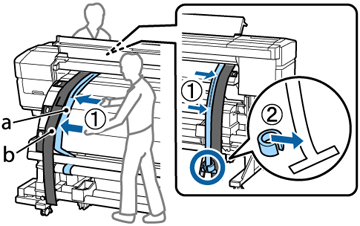
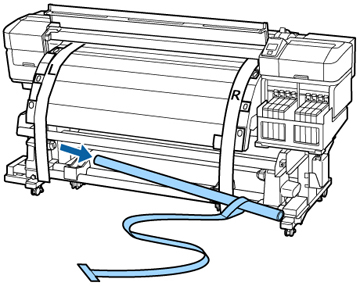
- Place the alignment tool (a) next to the left adjustment guide (b) and line them up at the front and back of the product. Then attach the counterweight to the alignment tool.
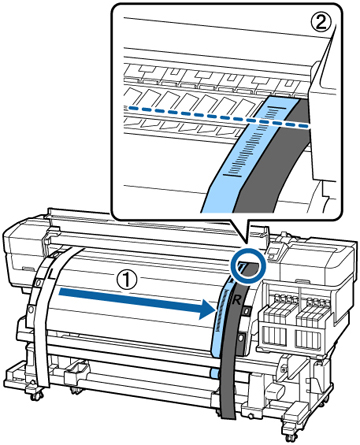
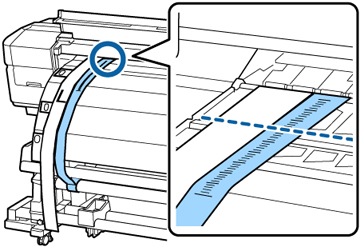
- Note the location where the alignment tool crosses the front of the white line on the platen.
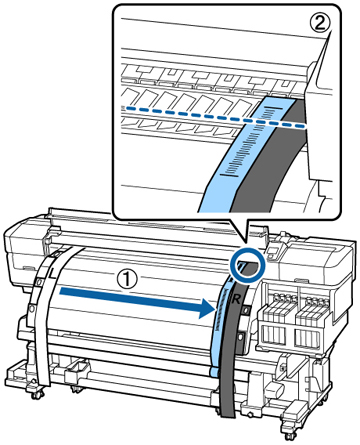
- Lift up the alignment tool and slide it to the other side of the product, next to the right adjustment guide. Line up the alignment tool and the adjustment guide at the front and back of the product. Note the location where the alignment tool crosses the front of the white line on the platen.
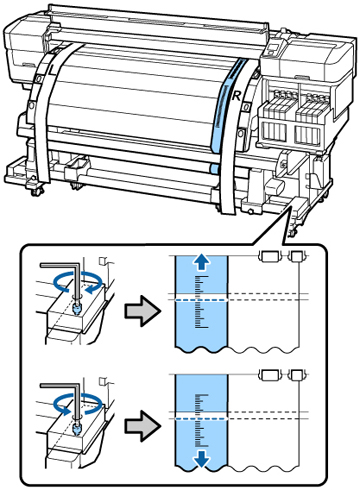
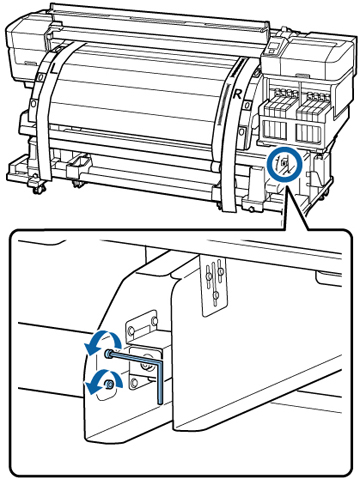
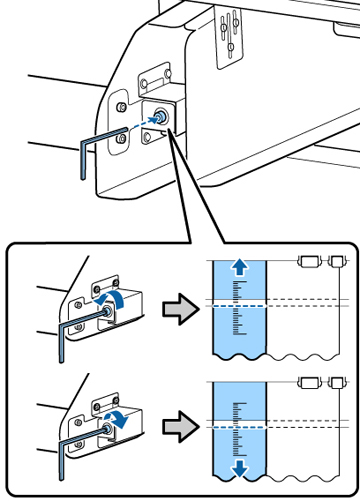
- Make sure all four of the mounting screws are loose. Use the large hexagon wrench to turn the silver adjustment screw counterclockwise to move the line back and turn it clockwise to move the line forward. The line moves approximately 1 mm with each turn of the screw. Continue to turn the silver adjustment screw until the measurements are the same.
- Fully tighten all four of the screws on the right bracket to secure it in place.
- At the back of the product, remove the counterweight.
- At the front of the product, remove the alignment tool.
- Move the alignment tool to the left side and feed it through the paper path between the media guide bar and the after heater.
- Place the alignment tool (a) next to the left adjustment guide (b) and line them up at the front and back of the printer. Then attach the counterweight to the alignment tool.
- Note the location where the alignment tool crosses the front of the white line on the platen.
- Lift up the alignment tool and slide it to the other side of the product, next to the right adjustment guide. Line up the alignment tool and the adjustment guide at the front and back of the product. Note the location where the alignment tool crosses the front of the white line on the platen.
- Use the small hexagon wrench to loosen the two screws.
- Make adjustments using the large hexagon wrench while holding the media guide bar. Turn the adjustment screw counterclockwise to move the line back and turn it clockwise to move the line forward. The line moves approximately 1 mm with each turn of the screw. Continue to turn the adjustment screw until the measurements are the same.
- Use the small hexagon wrench to tighten the two screws.
- At the back of the product, remove the counterweight.
- At the front of the product, remove the alignment tool. Then loosen the roll holder locking screw and remove the right roll holder.
- Remove the roll core and the alignment tool.
- Remove the alignment tool from the roll core.
- Remove the adjustment guides from the product.