- When you see the Know Your Wireless Network screen, click Next (Windows) or Continue (OS X).
- Follow the on-screen instructions to select your wireless network settings from your product control panel. When you finish, continue with the steps here.
- OS X: When you see this screen, click
Add Printer and follow the
on-screen instructions to add your product and the print queue to
your system. Then click Continue.
Note: Be sure to select your Epson product in the Use or Print Using drop-down list.
- When you see this screen, print a test page and click Next (Windows) or Continue (OS X).
- Do one of the following to
set up faxing:
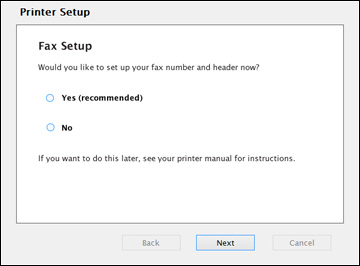
- Windows: When you see this screen, you can set up your fax number and header. Select Yes to set up fax settings now, or select No to set them up later. Then click Next.
- OS X:
When you see this screen, select Add
Fax and follow the on-screen instructions to add the fax
queue to your system. Then click Continue.
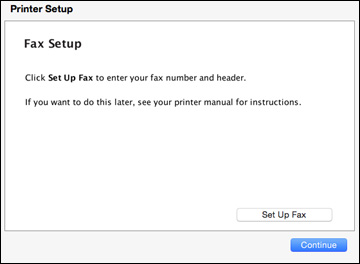
Note: Be sure to select your Epson product in the Use or Print Using drop-down list.When you see this screen, you can set up your fax number and header. Click Set Up Fax to set up fax settings now, or click Continue to set them up later.
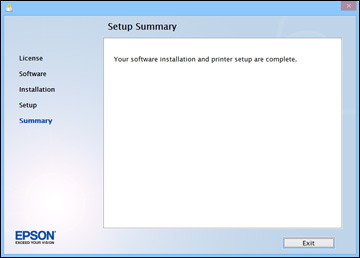
- Follow the on-screen instructions to complete product setup. When you see this screen, click Exit (Windows) or Close (OS X) to close the installation program.