To add your
product to a wireless network, you may need to know the name (SSID)
and password of your wireless network. If it has security enabled,
you also need to know the WEP key or WPA passphrase.
Note: If your
computer does not have a CD/DVD drive or you are using a Mac, an
Internet connection is required to obtain the product
software.
- Make sure your product is turned on but NOT CONNECTED to your computer with a USB
cable.
Note: With Windows, if you see a Found New Hardware screen, click Cancel and disconnect the USB cable.
- Insert the product CD or download your product’s software package from global.latin.epson.com/Support/L805.
- Select your language and click Next (Windows), or click Continue and click Continue again (OS X).
- Accept the software license agreement to continue with software installation.
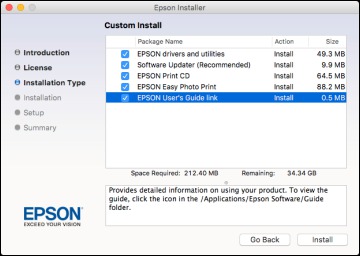
- When you see one of these
screens, click Install.
Windows
OS X
Note: With OS X, make sure you install Software Updater to receive firmware and software updates for your product.Software installation may take several minutes. Wait for the installation to complete. - OS X: If you see the following message, click Yes or No to continue.
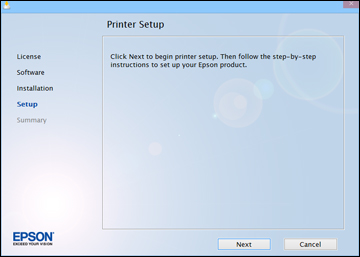
- When the Printer Setup screen appears, click Next (Windows) or Start (OS X) to begin setting up your product on your network.
- When you see this screen, select Wireless connection and click Next (Windows) or Continue (OS X).
- When you see this screen, select Set up printer for the first time and click Next (Windows) or Continue (OS X).
- The screen you see next
depends on whether your computer can wirelessly connect with your
product automatically or not.
- If your computer can connect automatically, you see the screen below. Go to step 12.
- If your Windows computer cannot connect automatically, you see the screen below. Go to step 11.
- If your Mac computer cannot connect automatically, you can complete setup using a temporary USB connection. See the link for those instructions below.
- Select one of these
network setup methods:
- To set up your product using the button on your product control panel, select Using printer button and click Next.
- To set up your product using a temporary USB connection, select Using temporary USB cable connection and click Next.
- To complete installation,
follow the steps for the setup method you selected in steps 10
and 11:
- If your computer can connect automatically, see the link for the auto connect instructions below.
- To set up your product using the buttons on your product control panel, see the link for those instructions below.
- To set up your product using a temporary USB connection, see the link for those instructions below.