When you
finish printing, use a commercially available cutter to cut the
media.
Warning: Be
careful not to cut yourself when using cutters or other sharp
blades. Also be careful touching areas near the after heater since
the after heater may be hot and you could be burned.
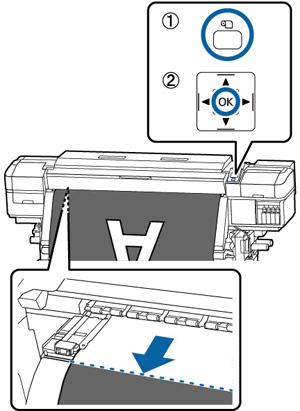
- Press
the
 media setup button.
 - Select
Feed To Cut Position and press the
OK button. The printer
feeds the media to the cutting position (cutter groove).
Note: If you printed the amount of media remaining onto your media, press the up arrow button to rewind the media as necessary to keep this information with the unprinted roll.
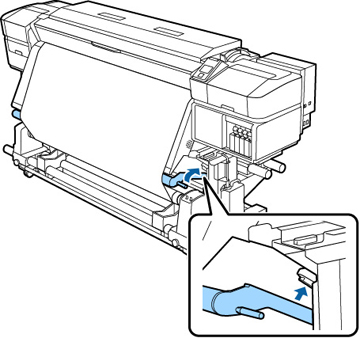
- If you are using the auto take-up reel, raise the tension bar.
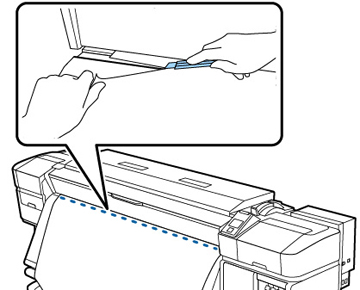
- Use your
cutting tool to cut the media along the cutting groove.
Warning: Do not place your fingers in the path of the cutting tool to avoid injuring yourself.
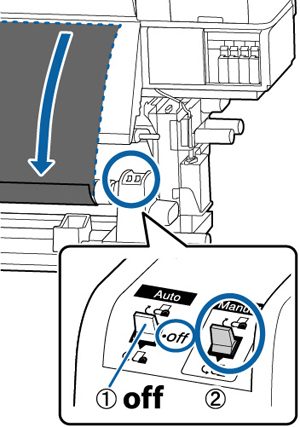
- Set the Auto switch to off, then set the Manual switch to take up the cut media onto the take-up reel, depending on the printable side of the media: