You can
project the same image from multiple projectors to create one large
image. You can use to up to nine projectors.

- Set an ID for each projector and adjust the position of the projected images.
- Adjust overlapping areas of the screen using Edge Blending.
- Select the Extended menu and press Enter.
- Select the Multi-Projection menu and press Enter.
- Select the Tiling menu and press Enter.
- Select the Layout menu and press Enter.
- Set the number of projectors in the Row and Column settings, select Set, and press Enter.
- Adjust the Edge Blending and Layout settings for each projector used for tiling.
- Select the Location Setup menu and press Enter.
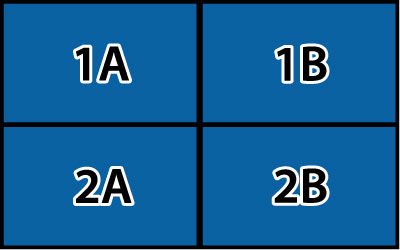
- Set the position of each
projected image in Row Order and
Column Order. Row Order: Layout the screens from top to
bottom in sequential order, starting with 1 at the top.
Column Order: Layout the screens from left to right, starting with A on the left.
- Choose the input signal and project the image.
- Select Extended > Multi-Projection > Scale, select Auto, and press Enter. The scale and clip range are automatically set according to the blending width.
- Fine tune any of the overlapping areas of the screens using Edge Blending or any of the other distortion correcting tools.