You
can use the Panel Alignment feature to manually adjust the color
convergence (the alignment of the red, green and blue colors) in
the projected image.
Note: Allow
your projector to warm up for at least 10 to 15 minutes and make
sure the image is in focus before you use the Panel Alignment
feature. For best results, project an image sized at least 60
inches (152 cm) diagonally on a projection surface that is not
colored or textured.
- Turn on the projector.
- Press the Menu button.
- Select the Settings menu and press Enter.
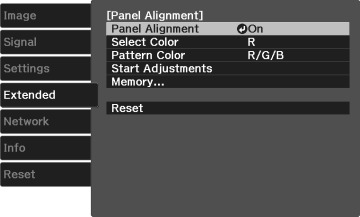
- Select the Panel Alignment setting and press Enter.
- Select the Panel Alignment setting and press Enter.
- Select On and press Enter.
-
Select the Select
Color setting and choose one of the following:
Note: You can only adjust the red or blue color convergence. Green is the standard color panel and cannot be adjusted.
- Select the Pattern Color setting and press Enter.
- Select the pattern you want to use and press Enter.
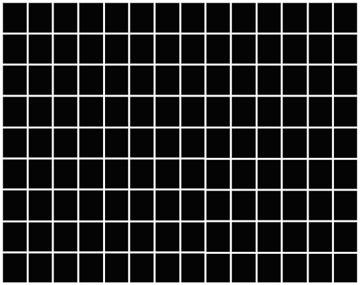
- Select Start Adjustments and press Enter. You see this screen:
- Press Enter. You see a screen like this:
- Use the arrow buttons on the remote control to adjust the color alignment of the color you selected for the Select Color setting.
-
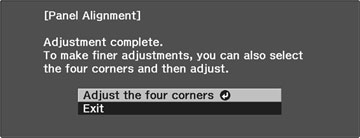
When you are finished adjusting the screen,
press Enter. You see this
screen:
Note: Your adjustments affect the gridlines in the entire screen. To fine-tune your adjustments, continue with the next steps.
- Select Adjust the four corners and press Enter. (Otherwise, select Exit and press Enter.)
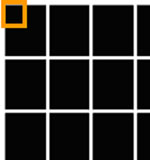
- Use the arrow buttons on the remote control to adjust the color alignment in the corner of the screen highlighted by the orange box.
- Press the Enter button to move to the next corner of the screen.
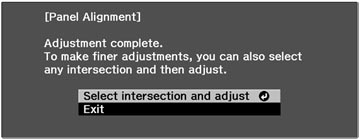
- When you are finished adjusting each corner of the screen, press Enter. You see this screen:
-
Do one of the following:
- If your projector's panel alignment is now correct, select Exit and press Enter to return to the Panel Alignment menu.
- If your projector needs additional panel alignment, select Select intersection and adjust and press Enter. Use the arrow keys on the remote control to highlight the corner of any misaligned box on the screen and press Enter. Repeat this step as necessary.
