You can
load receipts that meet the specifications in the input tray.
Note: Load only
one receipt at a time.
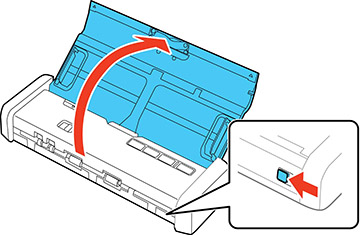
- Slide the cover latch to open the
scanner.
Note: Do not extend the paper guide.
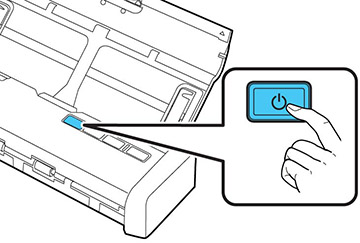
- Press the
 power button to turn on the
scanner, if necessary.
power button to turn on the
scanner, if necessary.
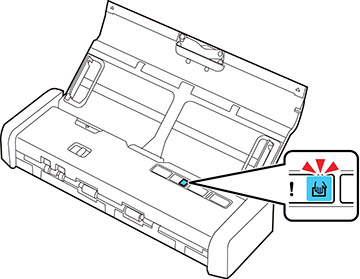
- Start the Epson Scan 2 program, select
the Automatic Feeding Mode checkbox
on the Main Settings tab, then click Scan. The Automatic Feeding Mode light on
the scanner turns on.
Note: Make sure to specify the correct Document Size in Epson Scan 2. If the receipt length is 34 inches (863.6 mm) or less, select Auto Detect (Long Paper) to detect the size automatically. If the receipt length is more than 34 inches (863.6 mm), select Customize and enter the paper size.
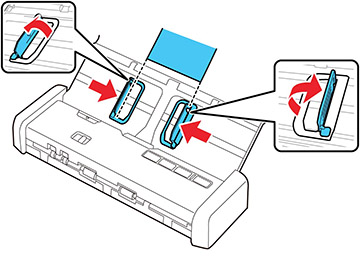
- Raise the input tray edge guides and adjust them to the width of the receipt.
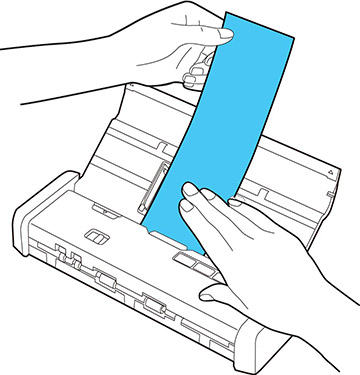
- Slide the mode selector to
 ADF and load the receipt into the input
tray printed side down and top edge first.
ADF and load the receipt into the input
tray printed side down and top edge first.
- Guide the receipt into the ADF and support it as it enters automatically into the scanner. (You can continue feeding receipts into the scanner, one after another, while the scanner is in Automatic Feeding Mode.)
- When you are finished scanning, press
the
 stop button on the scanner to
close Automatic Feeding Mode.
stop button on the scanner to
close Automatic Feeding Mode.