Finger touch
calibration coordinates the positioning of your finger with the
location of the cursor.
Note: Make
sure you have calibrated the pens, installed the Touch Unit and
turned it on before calibrating for finger touch
interactivity.
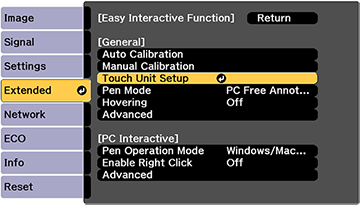
- Press the Menu button, select the Extended menu, and press Enter.
- Select the Easy Interactive Function setting and press Enter.
- Select Touch Unit Setup and press Enter.
- Select Touch Calibration
and press Enter. The
following screen appears:
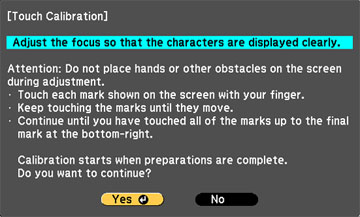
Note: If Touch Calibration is disabled, make sure Power is set to On.
- Adjust the image focus, if necessary.
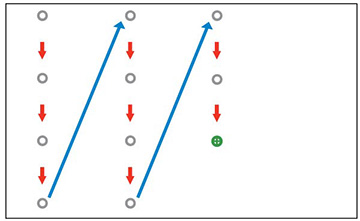
- Press Enter to select Yes. A flashing green circle appears in the upper left corner of your projected image.
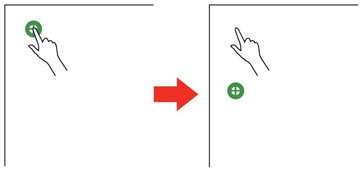
- Touch and hold the center of the circle with your finger
until the circle disappears and another circle appears, then
release it. The circle disappears, and you see another
circle below the first one.
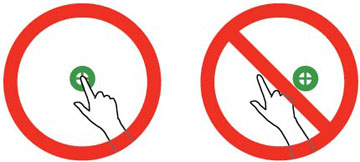
Note: For the most accurate calibration, make sure you touch the center of the circle with the tip of your finger.Note: Make sure you are not blocking the signal between your finger and the interactive receiver (next to the projection window on the projector).
- Touch the center of the next circle with your finger and
continue until all of the circles disappear. When you get to
the bottom of a column, the next circle appears at the top of a new
column.
Note: If you make a mistake, press the Esc button on the remote control to go back to the previous circle. To restart the calibration process, press and hold the Esc button for 2 seconds.
- If the cursor location and your finger position do not match, repeat these steps to calibrate again.