Before
you replace the lamp, let the projector cool down for at least one
hour so the lamp will not be hot.
Warning: Let
the lamp fully cool before replacing it to avoid injury.
You can replace the lamp while the projector is mounted on the wall or ceiling.
- Turn off the projector and unplug the power cord.
-
Allow the projector lamp to cool down for at
least one hour.
Warning: If the lamp is broken, glass fragments may be loose inside the lamp chamber. Be careful removing any broken glass to avoid injury. If the projector is mounted on the wall or ceiling, stand to the side in case the lamp is broken.
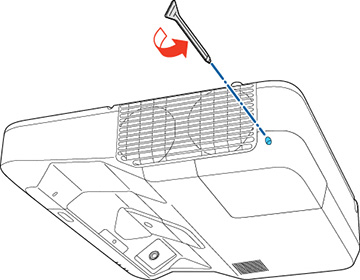
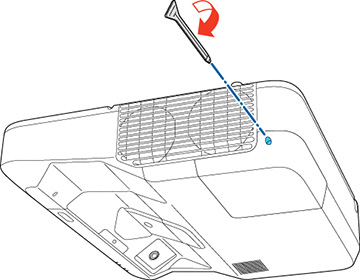
- Use the screwdriver included with the replacement lamp to loosen the screw securing the lamp cover.
-
Slide off the lamp cover.
Note: If the projector is suspended from a wall or ceiling, remove the lamp cover carefully and support it with your hand.
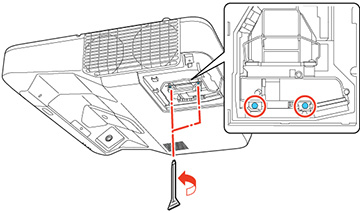
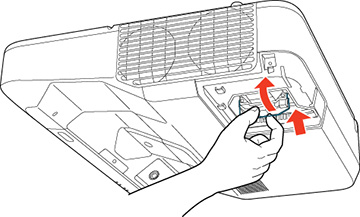
- Loosen the screws securing the lamp to the projector. The screws do not come all the way out.
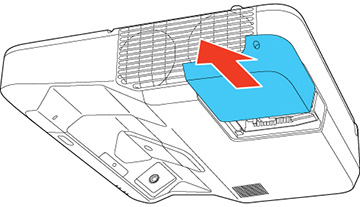
- Lift up the lamp handle and gently pull the lamp out of the projector.
-
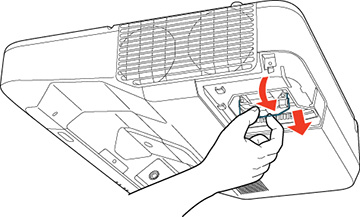
Gently insert the new lamp into the projector
along the guide rail. If it does not fit easily, make sure it is
facing the right way. Press the handle down.
Caution:Do not touch any glass on the lamp assembly to avoid premature lamp failure.
- Tighten the screws to secure the lamp.
-
Replace the lamp cover and tighten the screw
to secure it.
Note: Be sure the lamp cover is securely installed or the lamp will not come on.