- Press the Menu button.
- Select the Extended menu and press Enter.
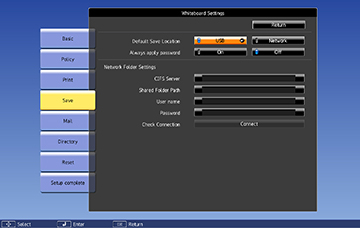
- Select Whiteboard Settings and press Enter.
- Select the Save menu and press Enter.
- Select the following options as necessary:
- Default Save Location lets you select the default location for saving whiteboard pages. Select USB to save them on a USB flash drive or Network to save them on a network folder.
- Always apply password lets you require that whiteboard files must be saved as password-protected PDF or EWF files.
- CIFS Server
lets you set the CIFS server's IP address or fully qualified domain
name (FQDN). You can enter up to 63 alphanumeric characters.
Note: You cannot use the following characters: " ' + , : ; < = > ? [ \ ] ` | or spaces. If you need to enter more characters, enter them using the Web Config utility. To use a FQDN, you must configure a DNS server. Enter a port number by adding it after the address or name and separating it with a colon, for example, FQDN:port_number or IP_address:port_number. You cannot use the following IP addresses: 127.x.x.x, 192.0.2.x, or 224.0.0.0 to 255.255.255.255.
- Shared Folder Path lets you enter the network folder name in this format: share_name\folder_name. You can enter up to 63 alphanumeric characters. You cannot use the following characters: " ' / : < > ? or |.
- User name lets you enter a user name with read/write privileges on the network folder. You can enter up to 64 alphanumeric characters. You can enter a domain name by adding it before the user name and separating them with a backslash in this format: domain\username.
- Password lets you enter a password for the user name you entered. You can enter up to 64 alphanumeric characters. After you enter the password and select Setup complete, the password is hidden.
- Check Connection lets you test the network connection.
Note: Use the displayed keyboard to enter the address, user name, and password if necessary. Press the arrow buttons on the remote control to highlight numbers and press Enter to select them. - When you finish selecting settings, select Setup Complete and follow the on-screen instructions to save your settings and exit the menus.