When the
rollers in paper cassette 1 need to be replaced, you see a message
on the LCD screen. There are three rollers for paper cassette 1,
two on the back of the printer and one on the cassette.
- Turn off the product.
- Unplug the power cord.
- Remove the replacement rollers from their package.
Caution:Make sure not to damage or dirty the surface of the rollers. If there is any dirt or dust on the rollers, clean them with a soft, moist cloth. Using a dry cloth can damage the surface of the roller.
- Pull out paper cassette 1.
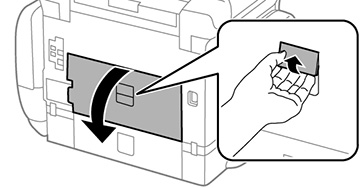
- Open rear cover 1 (D1).
- Pull out rear cover 2 (D2).
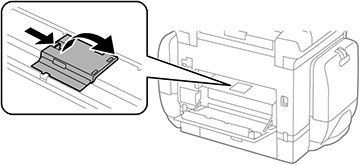
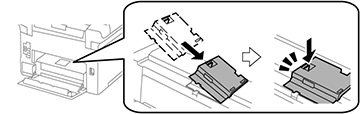
- Remove the roller cover inside the printer.
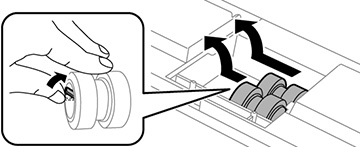
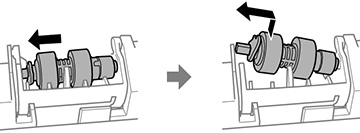
- Pull up on the tabs, then slide the rollers to the left to remove them.
- Insert the replacement
rollers and slide them to the right until they click into
place.

- Replace the roller cover
and press down on it until it clicks into place.
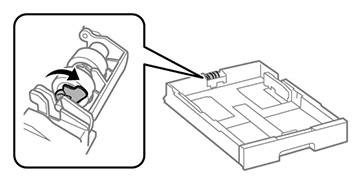
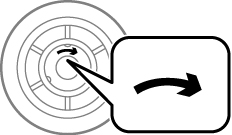
- On paper cassette 1, pull up on the lever to release the roller.
- Slide the roller towards the lever, then pull it out of the cassette.
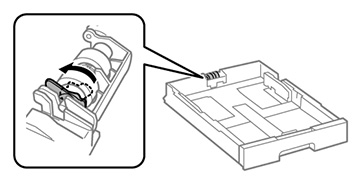
- Insert the pointed end of
the replacement roller's shaft into the hole on the cassette and
gently slide the roller into the slot with the flat side of the
shaft facing towards the front of the cassette.

- Press down on the lever to
lock the roller in place.
- Insert the paper cassette all the way into the product.
- Insert rear cover 2 (D2).
- Close the rear cover 1 (D1).