You can load roll paper with a 2- or 3-inch
core and a width of up to 17 inches (43 cm).
- On the control panel, press the
 paper source button.
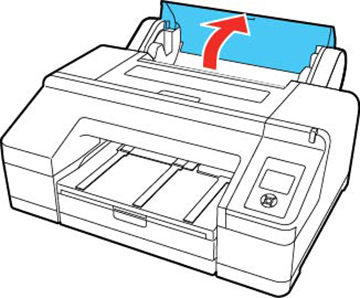
- Open the roll paper cover.
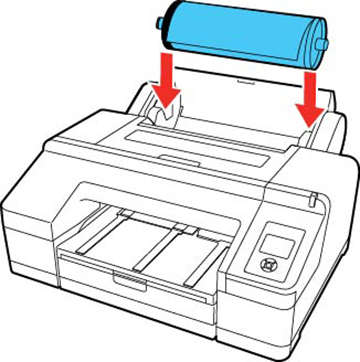
- Place the roll paper in the printer as shown (the black end of the spindle goes on the left).
- Press the
 load paper button on the
control panel.
load paper button on the
control panel.
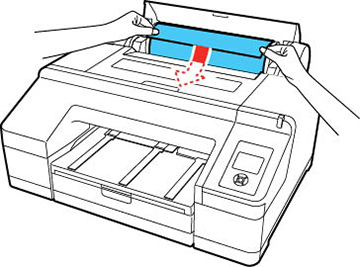
- Insert the leading edge of the roll
paper into the rear manual paper feeder until a message on the LCD
screen tells you to press the load paper button.
- Press the load paper button on the
control panel. The printer automatically feeds the paper to the
printing position.
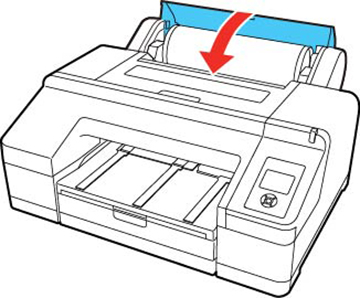
- Close the roll paper cover.
Note: To prevent dust from accumulating inside the printer, always keep the roll paper cover closed unless you are loading or unloading media.
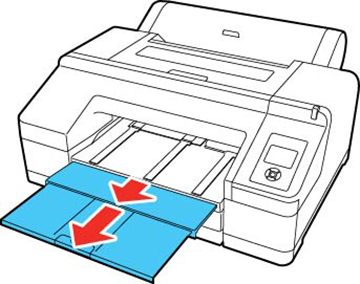
- Slide out the output tray. Do not
raise the paper stopper or the roll paper may not eject
correctly.
Note: If you are printing on plain paper or thin media types, or if you are using the optional Spectroproofer, raise the paper eject support. This prevents paper from curling up in the output tray, which can cause paper jams and print head strikes.