Make sure
you have a new maintenance box before you begin.
Caution:
Do not reuse a maintenance box that has
been removed and left uninstalled for more than a week. Keep the
maintenance box away from direct sunlight.
- Turn off the product using the
 power button.
 - Disconnect any connected cables.
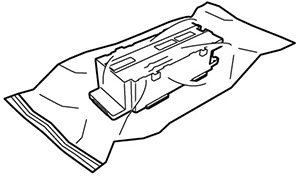
- Remove the new maintenance box from its package, but
retain the plastic bag to dispose of the used maintenance
box.
Caution:Do not touch the green chip on the maintenance box.
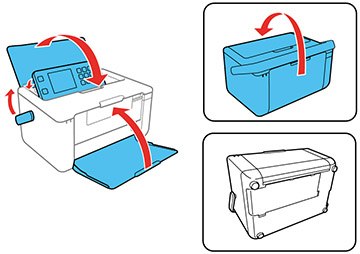
- Close the rear paper feed cover and output tray, move the handle forward, and flip the product over onto its back as shown.
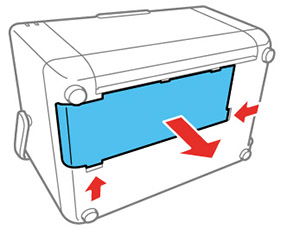
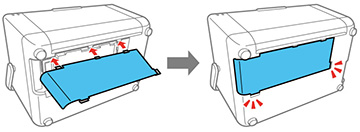
- Push in the tabs on the maintenance box cover and remove the cover.
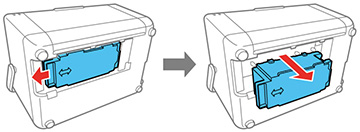
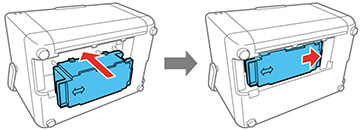
- Slide the maintenance box
as shown and remove it from the product.
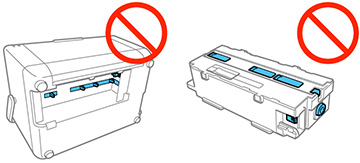
Caution:Do not touch the areas on the product or maintenance box shown here. Doing so may prevent normal operation or you may be smeared by ink.Warning: If ink gets on your skin, wash it thoroughly with soap and water. If ink gets into your eyes, flush them immediately with water. If ink gets into your mouth, spit it out and see a doctor right away. Keep ink cartridges out of the reach of children.
- Place the used maintenance
box in the plastic bag that came with the new maintenance box. Seal
the bag and dispose of it carefully.
Note: Do not drop the maintenance box or subject it to strong shocks.
- Insert the new maintenance box all the way into the product, then slide it as shown until it locks into place.
- Insert the tabs on the maintenance box cover into the
printer, then press down on the cover until it clicks into
place.
Note: If the maintenance box cover does not close, the maintenance box may not be installed correctly. Remove and reinstall the maintenance box, then try closing the cover again.