Make sure
you have a new maintenance box before you begin.
Caution:
Do not reuse a maintenance box that has
been removed and left uninstalled for more than a week. Keep the
maintenance box away from direct sunlight.
- Make sure the product is not printing.
- Remove the new maintenance box from its package.
Caution:Do not touch the green chip on the maintenance box.
- Open the front cover and use it to slide out the lower paper cassette.
- Raise the control panel.
- Use a flat-head screwdriver to loosen the screw on the maintenance box cover as shown, then remove the cover.
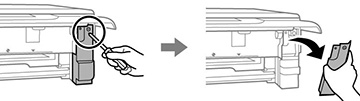
- Grasp the maintenance box as shown and pull it out of its
holder.
Warning: If ink gets on your skin, wash it thoroughly with soap and water. If ink gets into your eyes, flush them immediately with water. If ink gets into your mouth, spit it out and see a doctor right away. Keep the maintenance box out of the reach of children and do not drink the ink.
- Place the used maintenance box in the plastic bag that came with the new maintenance box. Seal the bag and dispose of it carefully.
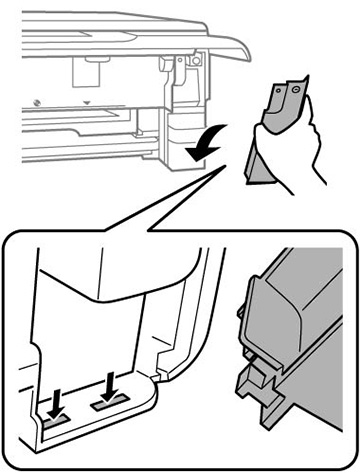
- Insert the new maintenance box into the holder and push it all the way in.
- Insert the maintenance box cover into the tabs on the printer as shown and tighten the screw to secure the cover.