Turn
on the computer or video equipment you want to use before you turn
on the projector so it can display the image source.
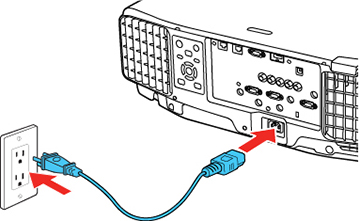
- Connect the power cord to the projector's power inlet.
-
Plug the power cord into an electrical
outlet. The projector's On/Standby
light turns blue. This indicates that the
projector is receiving power.
Note: With Direct Power On turned on, the projector turns on as soon as you plug it in.
-
Press the On button on the projector or remote control
to turn on the projector.
The projector beeps and the Status light flashes blue as the projector warms up. After about 30 seconds, the Status light stops flashing and turns blue.Warning: Never look into the projector lens when the laser is on. This can damage your eyes and is especially dangerous for children and pets.Caution:Make sure no objects are blocking the light from the projector lens. Objects blocking the lens for an extended time can melt and light that is reflected back into the lens can cause the projector to malfunction.
If you do not see a projected image right away, try
the following:
- Make sure the lens cap is off.
- Turn on the connected computer or video device.
- Insert a DVD or other video media and press the play button, if necessary.
- Press the Source
Search button on the projector or the Search button on the remote control to detect
the video source.
Note: If the Auto Source Search setting in the Extended menu is enabled, the projector automatically detects the input signal when you turn it on.
- Change the screen output from the computer when using a laptop.
- Press the button for the video source on the remote control.
- If the Home screen is displayed, select the source you want to project.