When you replace the head cleaning set, begin with replacing the wiper unit and the anti-drying caps.
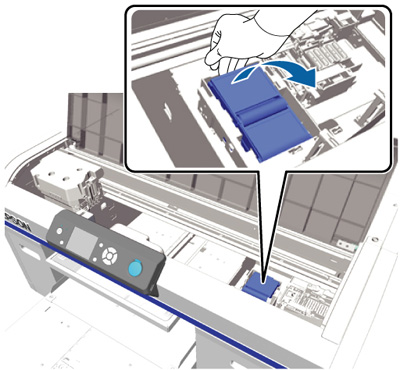
- Open the printer cover.
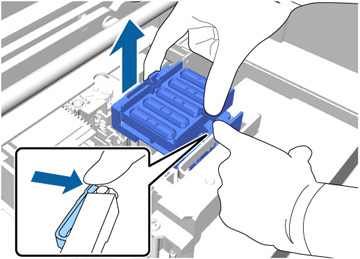
- Place your fingers into the groove at the back of the wiper unit and raise it slightly as shown.
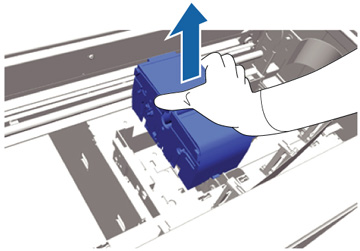
- Grasp the wiper unit as shown and lift it out of the printer.
- Wrap the
old wiper unit in the packaging you retained from the new wiper
unit and dispose of it according to your local laws and
regulations.
Caution:The wiper unit is classified as industrial waste. When handing it over to the industrial waste disposal company, make sure you include the Safety Data Sheet found on Epson's support website.
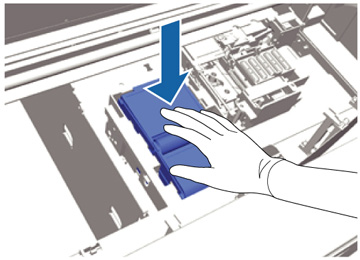
- Insert the new wiper unit into the printer as shown.
- Press down on the wiper unit until you hear it click into place.
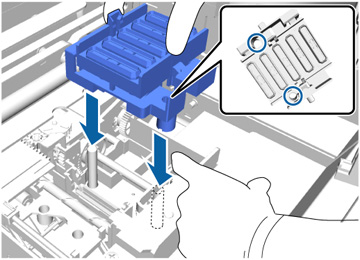
- Remove
the cover from the new anti-drying cap.

- To remove the anti-drying cap from the printer, pull the lever toward you as shown here, and lift out the anti-drying cap.
- Place the cover on the old anti-drying cap and put it in the bag you retained from the new anti-drying cap.
- Pull the
lever forward as shown, and install the new anti-drying cap,
placing the holes in the anti-drying cap over the posts on the
printer.