Clean around
the print head to remove any lint or fibers that have accumulated
around the print head nozzles.
Let the ink cleaning solution soak
into a new large cleaning swab.
Turn on
the printer.
Press
the maintenance button. The
Maintenance menu appears.
Press
the up or down arrow button to select Cleaning around head, and press the right arrow
button.
Press
the up or down arrow button to select Yes, and press the OK button. The platen and print
head move to the maintenance position.
Caution:
Do not move the print head or the platen
manually. A malfunction may occur.
Note: A buzzer
sounds after 10 minutes once the platen and print head move to the
maintenance position. Press the OK button to continue cleaning. The
buzzer sounds again after 10 minutes. Nozzles can be clogged if
more time passes, so finish cleaning as soon as
possible.
Open the
printer cover.
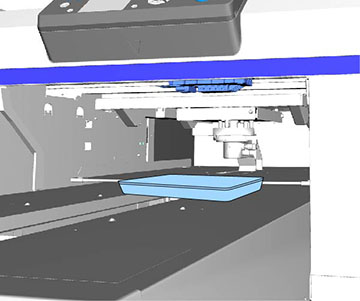
After
the print head has moved to the maintenance position, place a metal
or plastic tray, or a sheet of paper under the print head to
prevent ink from dripping onto the printer.
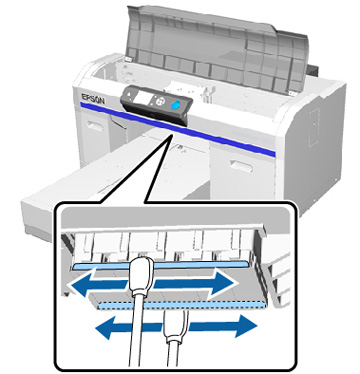
Look
into the print head below the control panel. Wipe the edges at the
front and rear of the nozzle surface with the cleaning swab as
shown.
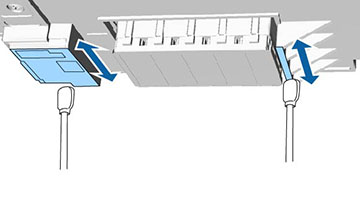
Wipe the
parts on the left and right of the nozzle surface.
Caution:
Do not touch the nozzle surface or the parts
on the left side of the nozzles with the cleaning swab. A
malfunction may occur.
When the
area around the print head is clean, remove the tray or paper that
you placed on the movable base.
Close
the printer cover.
Press
the OK button.
The print head returns to its normal position.