You
can set up network scanning to your scanner using the Epson Scan 2
Utility.
First manually configure your scanner to connect to your network. Then follow the instructions here to set up your computer for network scanning using the Epson Scan 2 Utility. Your scanner must be turned on and connected to the network.
Note: Make a note
of the IP address or host name of the scanner so you can enter it
in these steps.
- Do one
of the following to start the Epson Scan 2 Utility:
- Windows 10: Click
 > EPSON > Epson Scan 2
Utility.
> EPSON > Epson Scan 2
Utility. - Windows 8.x: Navigate to the Apps screen and select Epson Scan 2 Utility.
- Windows (other versions): Click
 or
Start > All Programs or Programs > EPSON > Epson Scan
2 > Epson Scan 2
Utility.
or
Start > All Programs or Programs > EPSON > Epson Scan
2 > Epson Scan 2
Utility. - Mac: Open the Applications folder, click Epson Software, and click Epson Scan 2 Utility.
- Windows 10: Click
- Select
Settings from the Scanner drop-down
list. You see a screen like this:
Note: If you see an Enable Editing button (Windows) or a lock icon (Mac), click it so that you can modify the scanner settings.
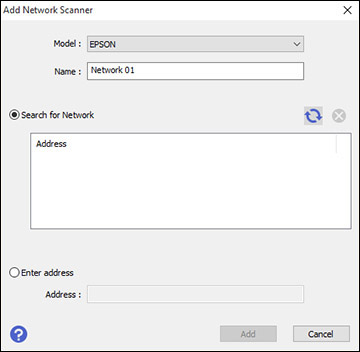
- Select your scanner and click Add. You see a screen like this: