You can
load different sizes of photos in the input tray in a single batch
in these sizes: 4 × 6 inches
(102 × 152 mm) and 5 × 7
inches (127 × 178 mm). Group photos of the
same size next to each other with the largest at the back.
Caution:
Do not load fragile or irreplaceable photos,
or valuable original documents or artwork, directly into the input
tray. This may wrinkle or damage the original. Load these originals
using the included carrier sheet.
Follow these guidelines when loading photos:
- Do not mix photos and documents.
- Scan photos of the same size in a batch.
- Do not add more photos during scanning.
- The total thickness of the photo stack must be less than 0.3 inch (8 mm) including any curve in the photos.
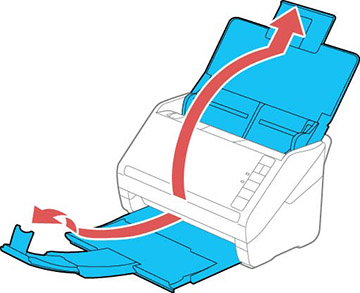
- Open the scanner cover, pull up the input tray extension, extend the output tray, and open the stopper.
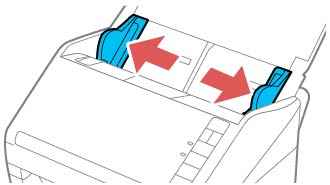
- Slide the input tray edge guides all the way out.
- Load
your photos in the center of the input tray in descending order of
size with the largest at the back and the smallest at the front.
The photos should be faceup, in landscape orientation and top edge
first. Center the photos in relation to each other.
Note: If you have both portrait- and landscape-oriented photos in the same stack, you can rotate the portrait images after scanning.
- Slide the edge guides against the edges of the widest photo.